How to Create, Import, and Print Flash Cards with BookWidgets
 Lucie Renard —
At BookWidgets, we’re constantly hard at work to give you the best teacher creation tool there is. In this blog post, I’ll show you a few of the new things we added to BookWidgets. More specifically, I’ll show you:
- How to make Flash Cards in just a few minutes by importing a CSV file
- How you can print out your widgets
How to make Flash Cards by importing a CSV file in BookWidgets
Up till now, you had to add flash cards one by one. This is easy enough to do, but when you have lots of lots of cards, or there’s an advanced way to do it even faster:
1. Create a “flash card list” in Excel
Make a list of all your flash cards in Excel (or another spreadsheet app such as Google Docs, OpenOffice, …). Use this flash card file template to begin with. Make sure to make a copy of the file before you start adding words.
Add all the flash cards' aspects, or leave some open if you don’t want to include them.
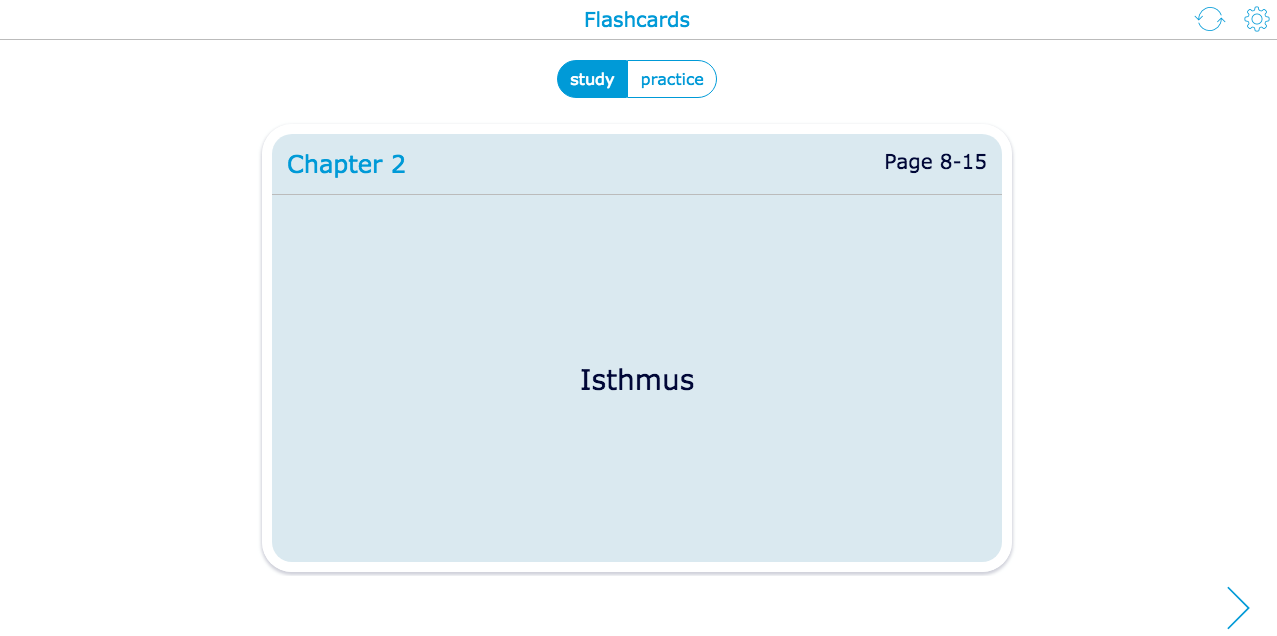
The example above will have the following result. Click on the image to take a closer look.

When you’re done filling in the spreadsheet, you have to save the file as a CSV file. In Excel, you have to ‘Save as unicode text’ to do this; in other spreadsheets, saving the file as a CSV file is enough.
Some things to take into account when creating your CSV file:
- The configuration values for front and back layout have to use the English terms, no matter what language your cards are in.
- It’s important to leave the first line in the file template untouched. You can’t just add your own values.
- It’s only possible to add text to your flashcards when you import a CSV file. You can always add images separately. If you want to insert images and audio using the CSV file, you need to download BookWidgets for Mac OS X or Windows from the downloads page. When using the downloaded version, it’s important to save your audio files in the same folder as your downloaded .csv file.
2. Import your .CSV file
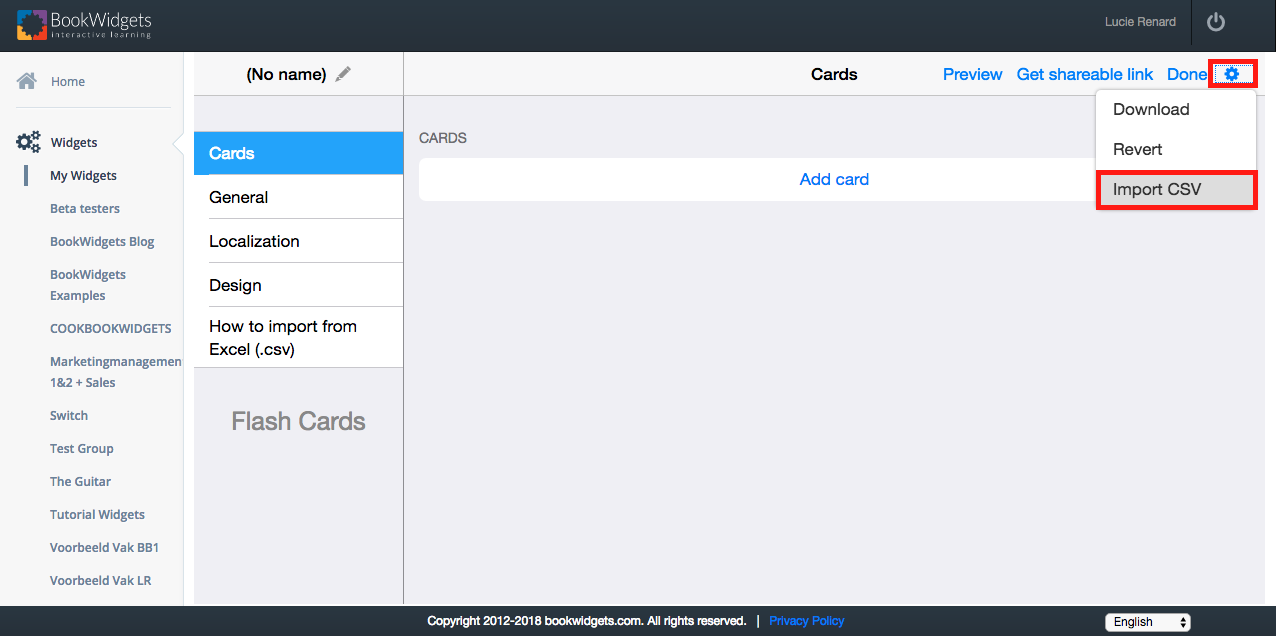
With a new (or existing) Flash Cards widget open, open the cog wheel menu in the upper right corner, and choose “Import CSV”.

The widget editor will fill your list with all the flashcards from your CSV file. To see how this looks for your students, click on “Preview” in the upper right corner.
Now, there’s only one thing left to do:
3. Upload your widget and share with students
Get your shareable link in the upper right corner. Then, share the widget link with your students or send it to Google Classroom.
How to print out widgets in BookWidgets
When the internet fails, you better have a plan B. BookWidgets encourages you to create digital exercises, but when the stress is at his highest point, we also want to relieve you from that too. Here’s how you can print out widgets:
1. Create a widget
To be able to print a widget, you have to make one first.
Note that not every widget has a print option. Here’s a list of all the widgets you can print out on paper:
- Quiz
- Worksheet
- Split Worksheet
- Crossword
- Exit Slip
- Survey
- WebQuest
- Bingo
- PairMatching
- Word Search
- Checklist
2. Check the preview & Print
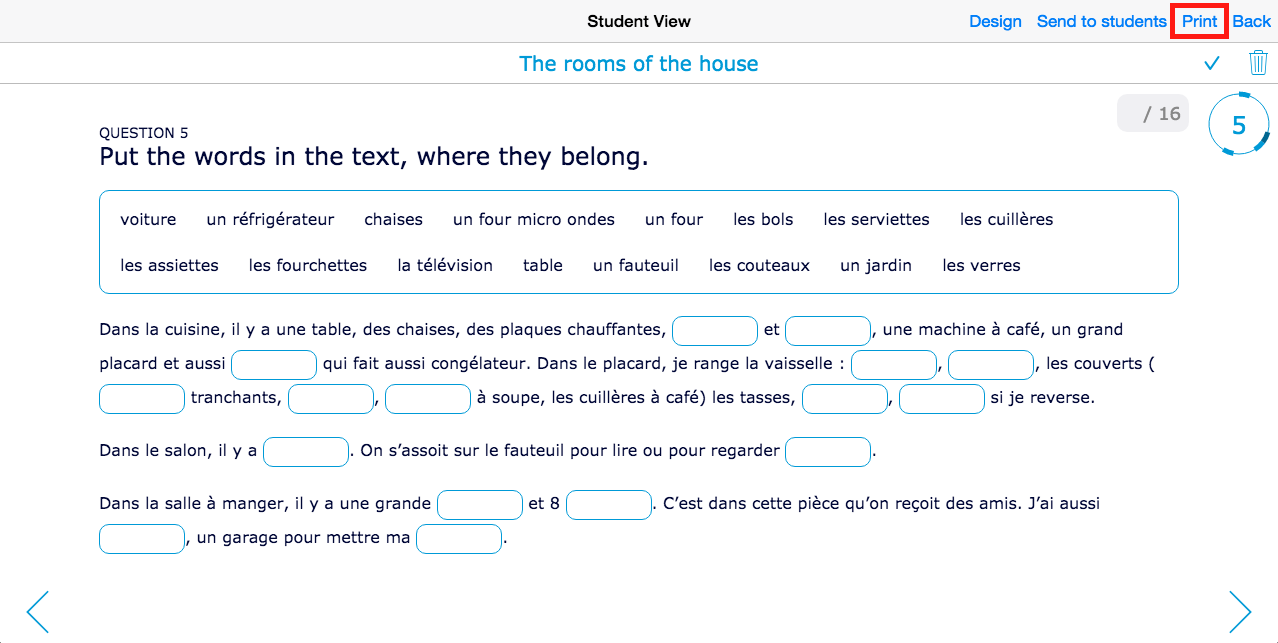
When done, click on “Preview” in the right upper corner. You’ll see your widget and a few more options. Here you can change your widget’s design. Now, you can also click on “Print”.
!! Make sure to enable “Print backgrounds (Safari)” or “More settings > Background graphics (Chrome)” in the print dialog to include all the images of your widget.
You’ll see that some widgets and question types are more suited for printing than others. Keep in mind that BookWidgets is a digital tool: Some interactive exercises or question types are not interactive on paper.

That’s it! I hope these 2 additions help you with building your lessons. Keep checking out our blog as all updates and fun lesson ideas are posted there.


