The best way to create interactive reading assignments - 4 fun reading lesson plans
 Lucie Renard —
Reading and understanding what you read is very important when it comes to learning a language. Some students are very good at it, others need more time or help understanding a text.
In this blog post, I’ll show you how you can create interactive reading exercises (or tests) that have different configuration options for your classroom. On top of that, I’ll reveal a new BookWidgets addition to make reading an even better experience. So, experienced BookWidgets lovers, you can skip right ahead and jump to BookWidgets’ newest feature. If you don’t know BookWidgets, read on to find out how to make reading exercises more fun!
5 steps to creating a digital reading exercise
What you need to know before moving on: with BookWidgets, you can create interactive and digital exercises for students that work on any device. Choose between 40+ exercise templates such as quizzes, crossword riddles, timelines and so on and adapt them with your own content.
1. Choose your widget
The best BooKWidgets exercise templates for reading exercises are the “Split Worksheet” widget and the “Split Whiteboard” widget. Let me tell show you the difference below. Check out the examples to see what kind of reading exercises you can create with these BookWidgets exercises. As you know, you can adapt them with your own content entirely.
The Split Worksheet Widget
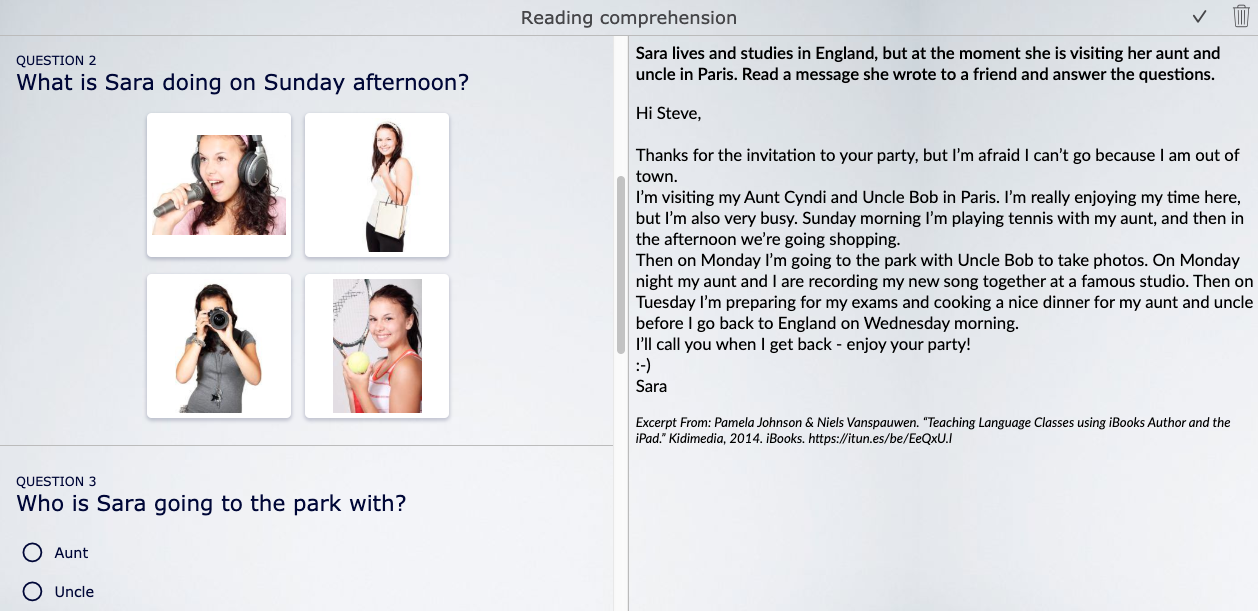
With the Split Worksheet widget, you can add a text which students have to read on one side, and ask them questions about the text on the other side of the exercise. Choose between 30 different interactive question types and adapt them with your own content. Most of the question types get automatically graded as well. You can configure this widget in any different ways.
 Reading lesson plan 1: An automatically graded reading excercise in which students have to read a letter and answer questions about the content.
The exercise in the example is an automatically graded example where students get immediate results. Of course, you can also choose for them to submit the assignment or reading test. That way, you can review their work and send back student-oriented feedback.
The Split Whiteboard Widget
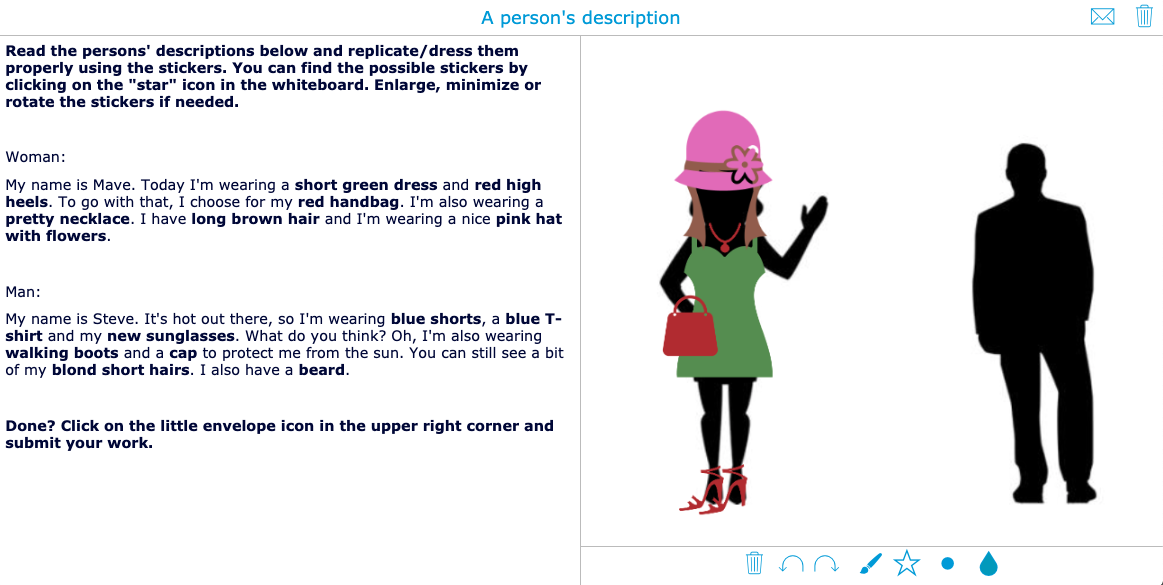
The Split Whiteboard is a bit different, but still perfect for reading exercises. You can still add a text that students have to read on one side of the widget. The other side is where the magic happens: it’s a whiteboard on which students can write, draw, and add images.
Check out these two creative reading lesson ideas below. Click on the image to go to the exercise.
 Reading lesson plan 2:
An interactive reading exercise about describing a person. Students have to read the text and dress up the characters based on the description in the text.
 Reading lesson plan 3: An interactive reading exercise in which students have to read road instructions, and replicate them in the correct way on the whiteboard background image.
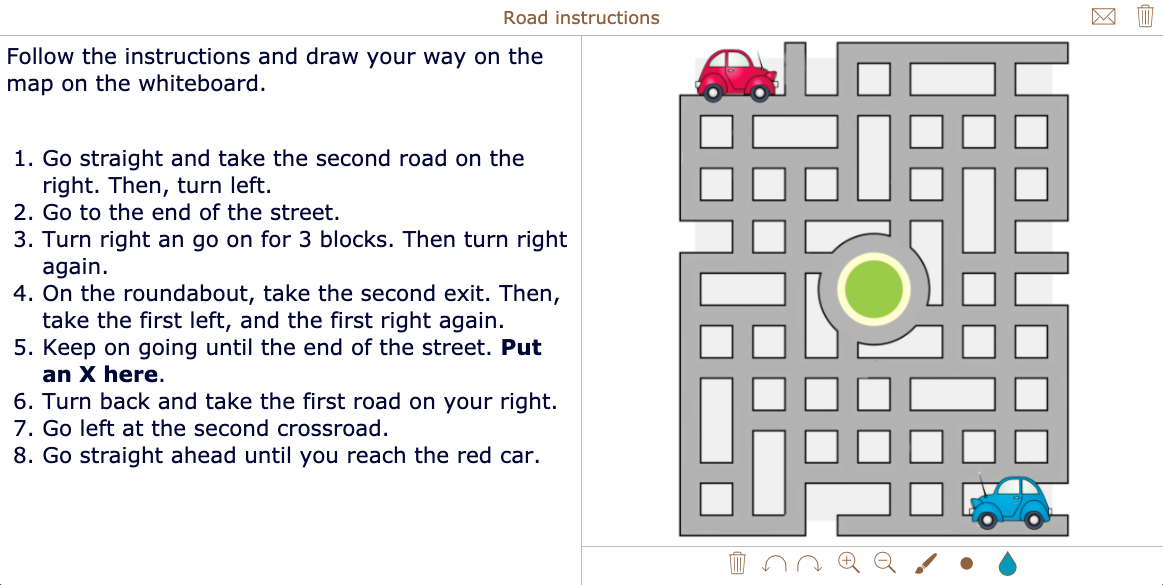
As you can see, these two widgets or interactive exercises allow you to create fun reading exercises. Add a background image and a text with clear instructions. You can directly measure your students’ understanding by reviewing what they did on the whiteboard. Students just have to click on the little envelope in the upper right corner and send their work to you.
2. Add a text or PDF
For the text part of the Split Whiteboard and Split Worksheet widget, you can type a text, add an image, video, and audio, and insert a link in your text. This is pretty convenient, as images are often used in reading exercises. But, up until now, the options to layout your text are limited; if you already have a document with formatted text (e.g. an excerpt from your course text), you had to type a copy of it and format it yourself.
That changes now! Besides typing your own text, you can now choose to add an existing .PDF document as well. This means that students can read a completely formatted text or article, without you having to copy it. Just indicate in the widget that your text is a PDF, and upload a PDF from your computer. Check out the reading exercise lesson idea below that includes a PDF.
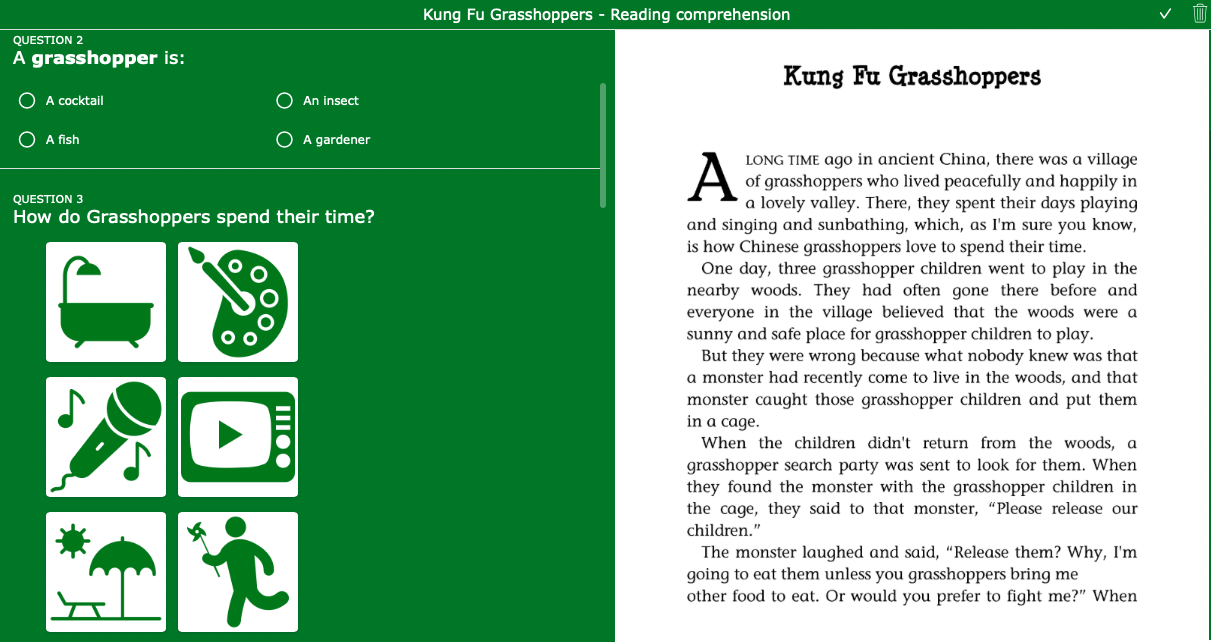
 Reading lesson plan 4: An automatically graded worksheet with interactive questions about a fiction story.
3. Add questions or configure your whiteboard
Based on your text, you have to add questions to your Split Worksheet, or configure your Split Whiteboard by adding, for example, a background image or stickers.
4. Share with your students
When you configured both parts of the reading assignment, you’re ready to share it with your students. Just get a shareable link and share it with your students. You can also immediately share BookWidgets exercises in Google Classroom and other LMSes. Or, you can share a QR-code that students can scan.
Students open the exercises and start reading. Afterwards, they can submit their answers if you’ve enabled them to do so.
5. Review student work
When students submit the reading exercise, you can review their work and give feedback via the BookWidgets “grades and reporting” page. Now, all you have to do is return the reviewed work to the students, and the loop is closed!
Wrap up
I hope these 5 easy steps to create a digital reading exercise inspire you to create exercises like these yourself. Get started right here:
Do you want to use the reading lesson plans used in this blog post? You can just copy the links and share them with your students. If you want to make changes to the widgets, duplicate them right here, and adapt them with your own content.
