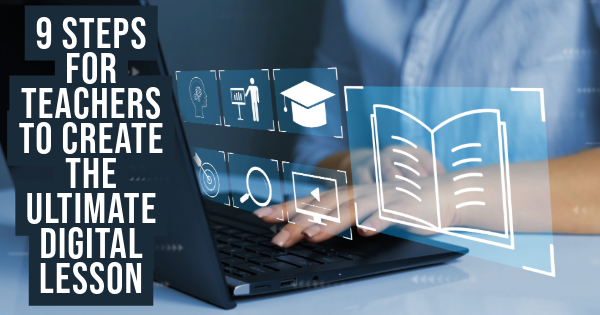
9 Steps for Teachers to Create the Ultimate Digital Lesson
 Lucie Renard —
As the educational landscape continues to embrace digital transformation, educators need practical tools to deliver engaging and interactive lessons. Today, I’m showing you how to create an entire digital lesson that’s interactive, too. I’m using a WebQuest format for this.
If you’re wondering how to get this complete digital lesson template to fill with your content, the answer is BookWidgets. BookWidgets is a versatile platform that allows teachers to create dynamic digital activities. One of the most powerful tools within BookWidgets is the WebQuest widget, which helps teachers build inquiry-based lessons that encourage student exploration and critical thinking.
🎉 NEW! With a recent update within BookWidgets, the WebQuest widget now includes an easy-to-use and more elaborate rich text editor, making it easier than ever to design visually appealing and content-rich lesson plans. In this post, I’ll walk you through creating a complete digital lesson using a WebQuest editor and provide jaw-dropping examples to spark inspiration. ✨ Yes, like always on the BookWidgets Teacher blog, you can use the interactive lesson plans for free, duplicate them, and change them to fit your and your student’s needs.

Why Using WebQuests in Your Lessons is a Game-Changer
The official definition of a WebQuest goes like this: “a WebQuest is an inquiry-oriented activity where learners gather information from the web”. This method fosters critical thinking, problem-solving, and collaboration. BookWidgets flipped the meaning a bit so teachers can easily add their own lesson content to a WebQuest-based lesson. Teachers can build structured activities that guide students through a process of discovery.
Now, with the new rich text editor, designing these digital lessons has become even more efficient and creative. Teachers can seamlessly format text, add images, embed videos and audio, insert interesting webpages, and other interactive widget activities like quizzes and games to create a more immersive learning experience.

10 Ways Teachers Can use Interactive WebQuest in their Lessons
WebQuests offer versatile opportunities for enhancing digital lessons, making them ideal for a wide range of educational purposes. Whether you’re fostering research skills or encouraging creative writing, a well-designed WebQuest can engage students and promote deeper learning. Below are ten ways teachers can incorporate WebQuests into their lessons to achieve various learning objectives. For each purpose, I added a lesson example using a WebQuest activity. Click the images to open the examples.
You can find all examples listed in this BookWidgets group folder. You may use them for free. Duplicate the lesson activity to make changes to your and your students needs.
| Lesson Purpose | Description | WebQuest Lesson Example |
|---|---|---|
| Homework Bundels | Provide structured homework tasks to students by bundling them into one digital lesson. Example about Bedtime Stories 👉 | 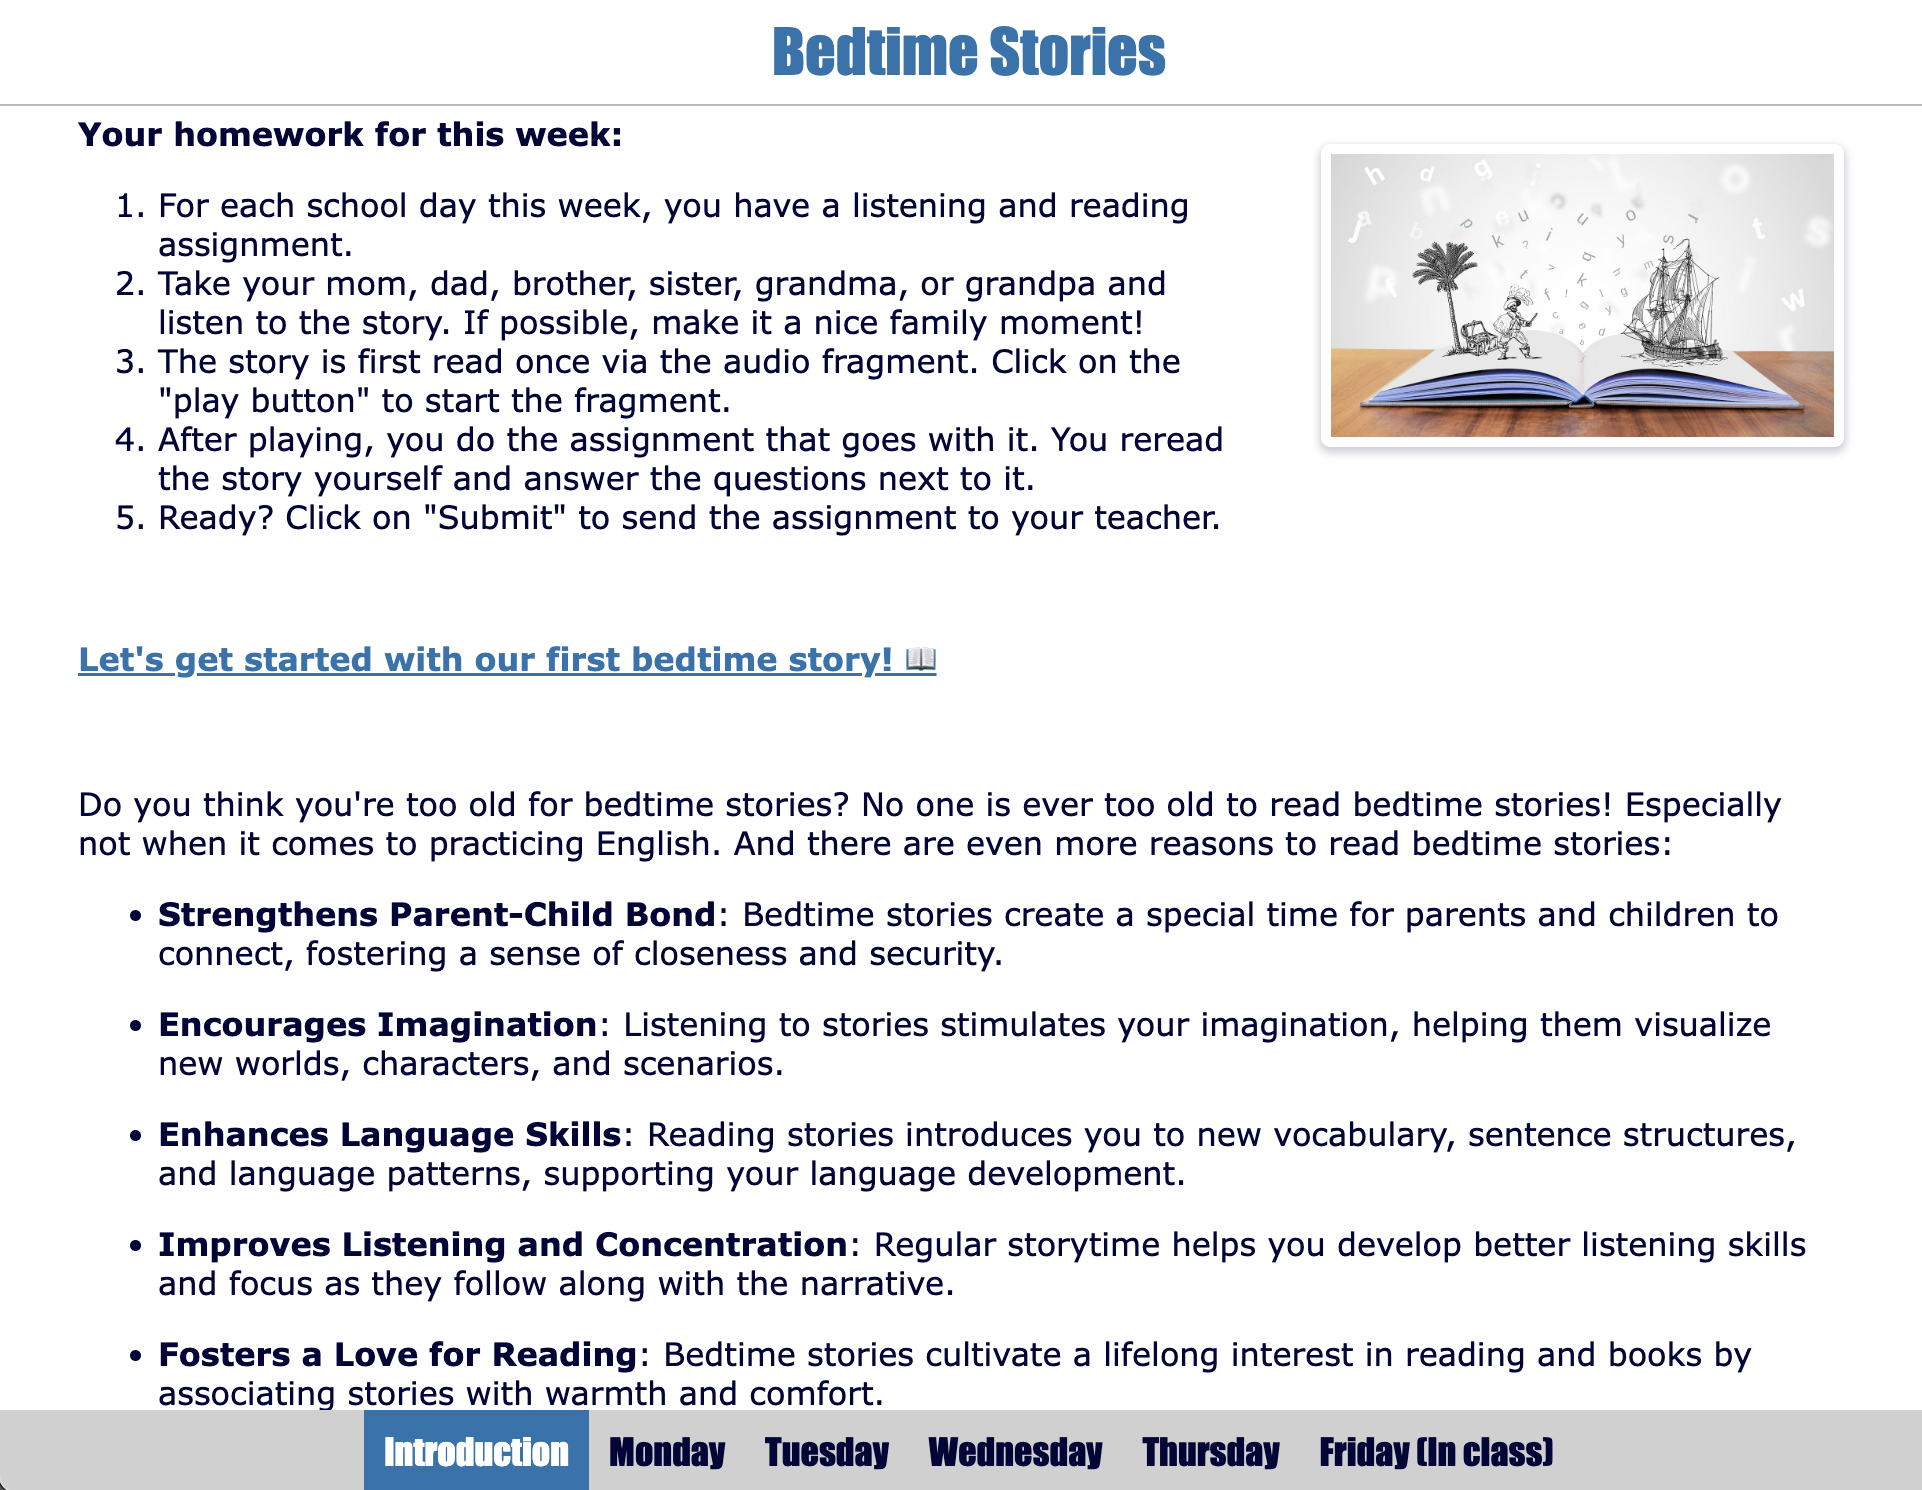 |
| Problem-Solving Quests | Encourage students to analyze, investigate, and evaluate information to test problem-solving skills. Examples lesson about Halloween 👉 | 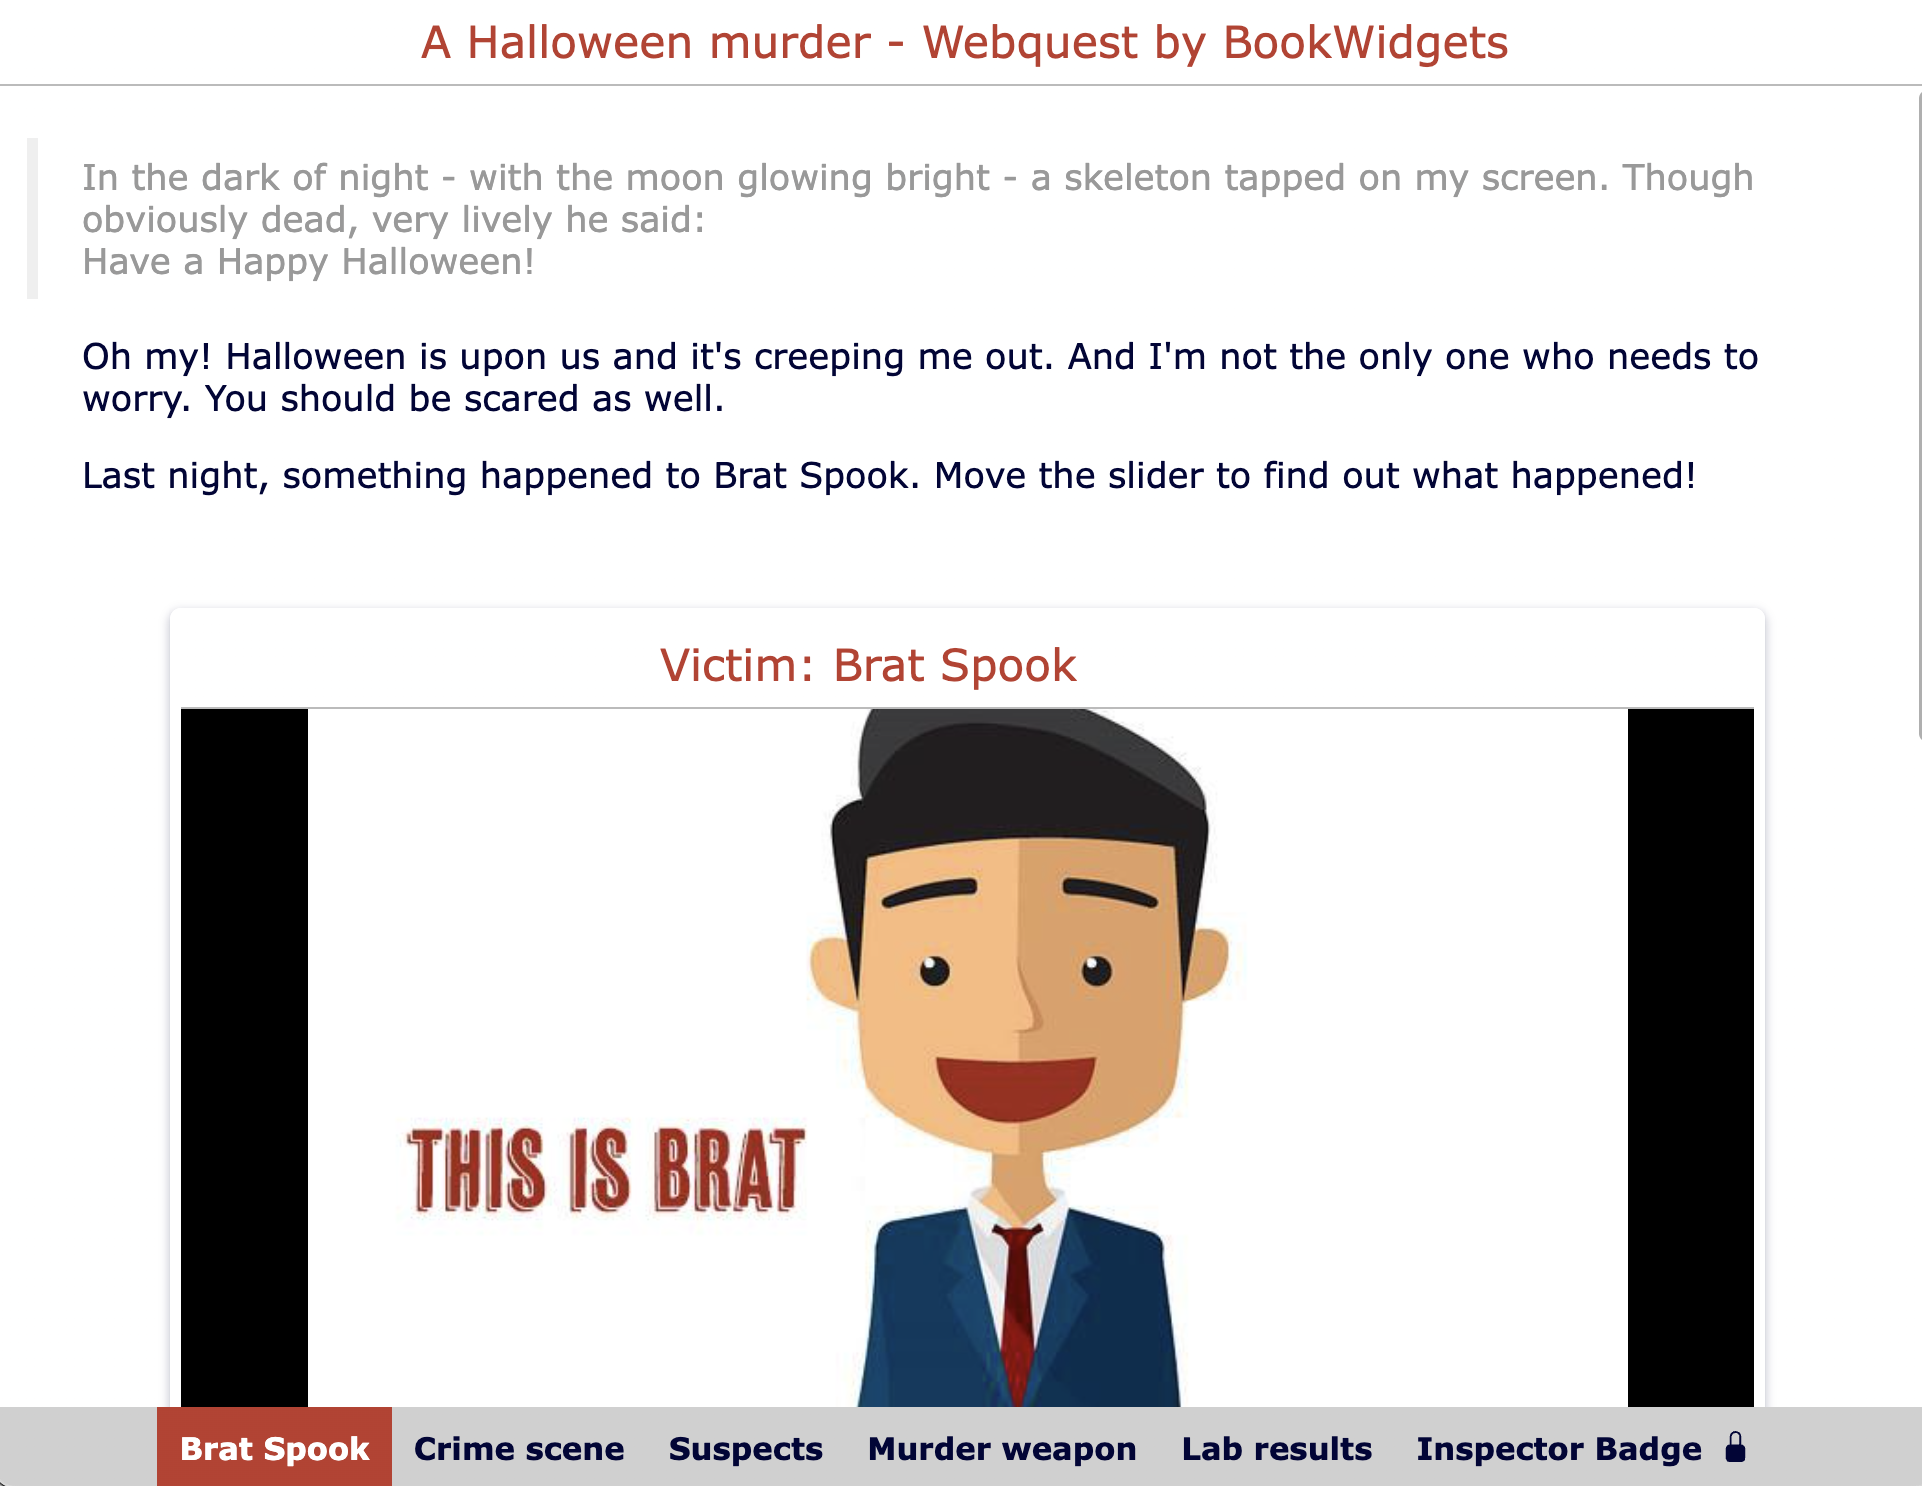 |
| Awareness Days | Spotlight lesson content about important days in our history/ throughout the year for students to learn about. Example lesson about September 11 👉 | 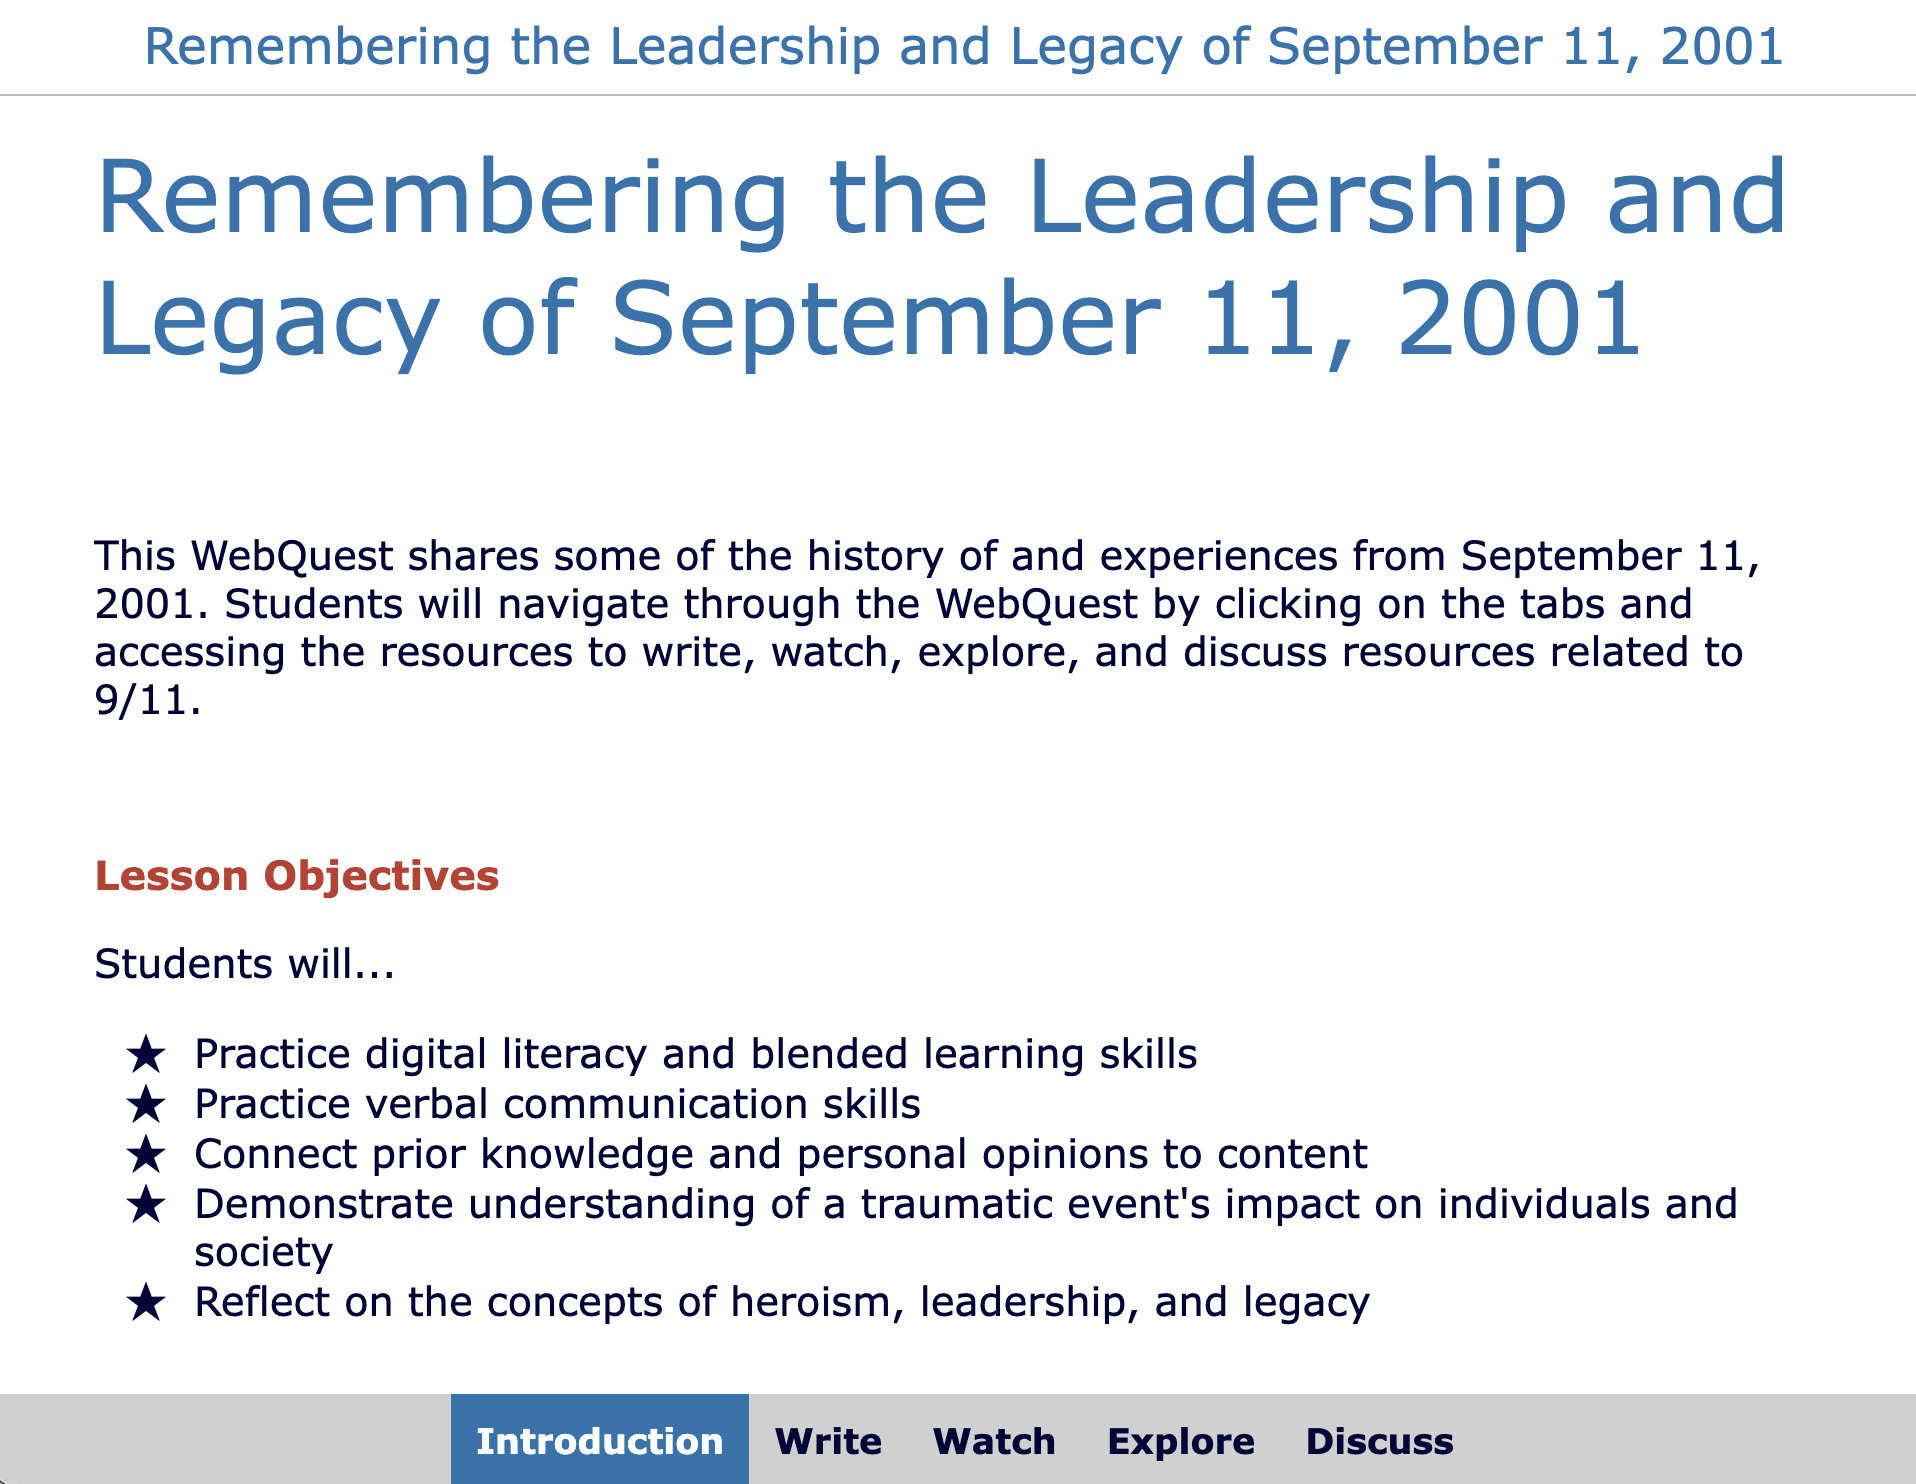 |
| Storytelling & History | Lead students through the life of a historical key figure known for their contribution to a field. Example lesson about Shakespeare 👉 | 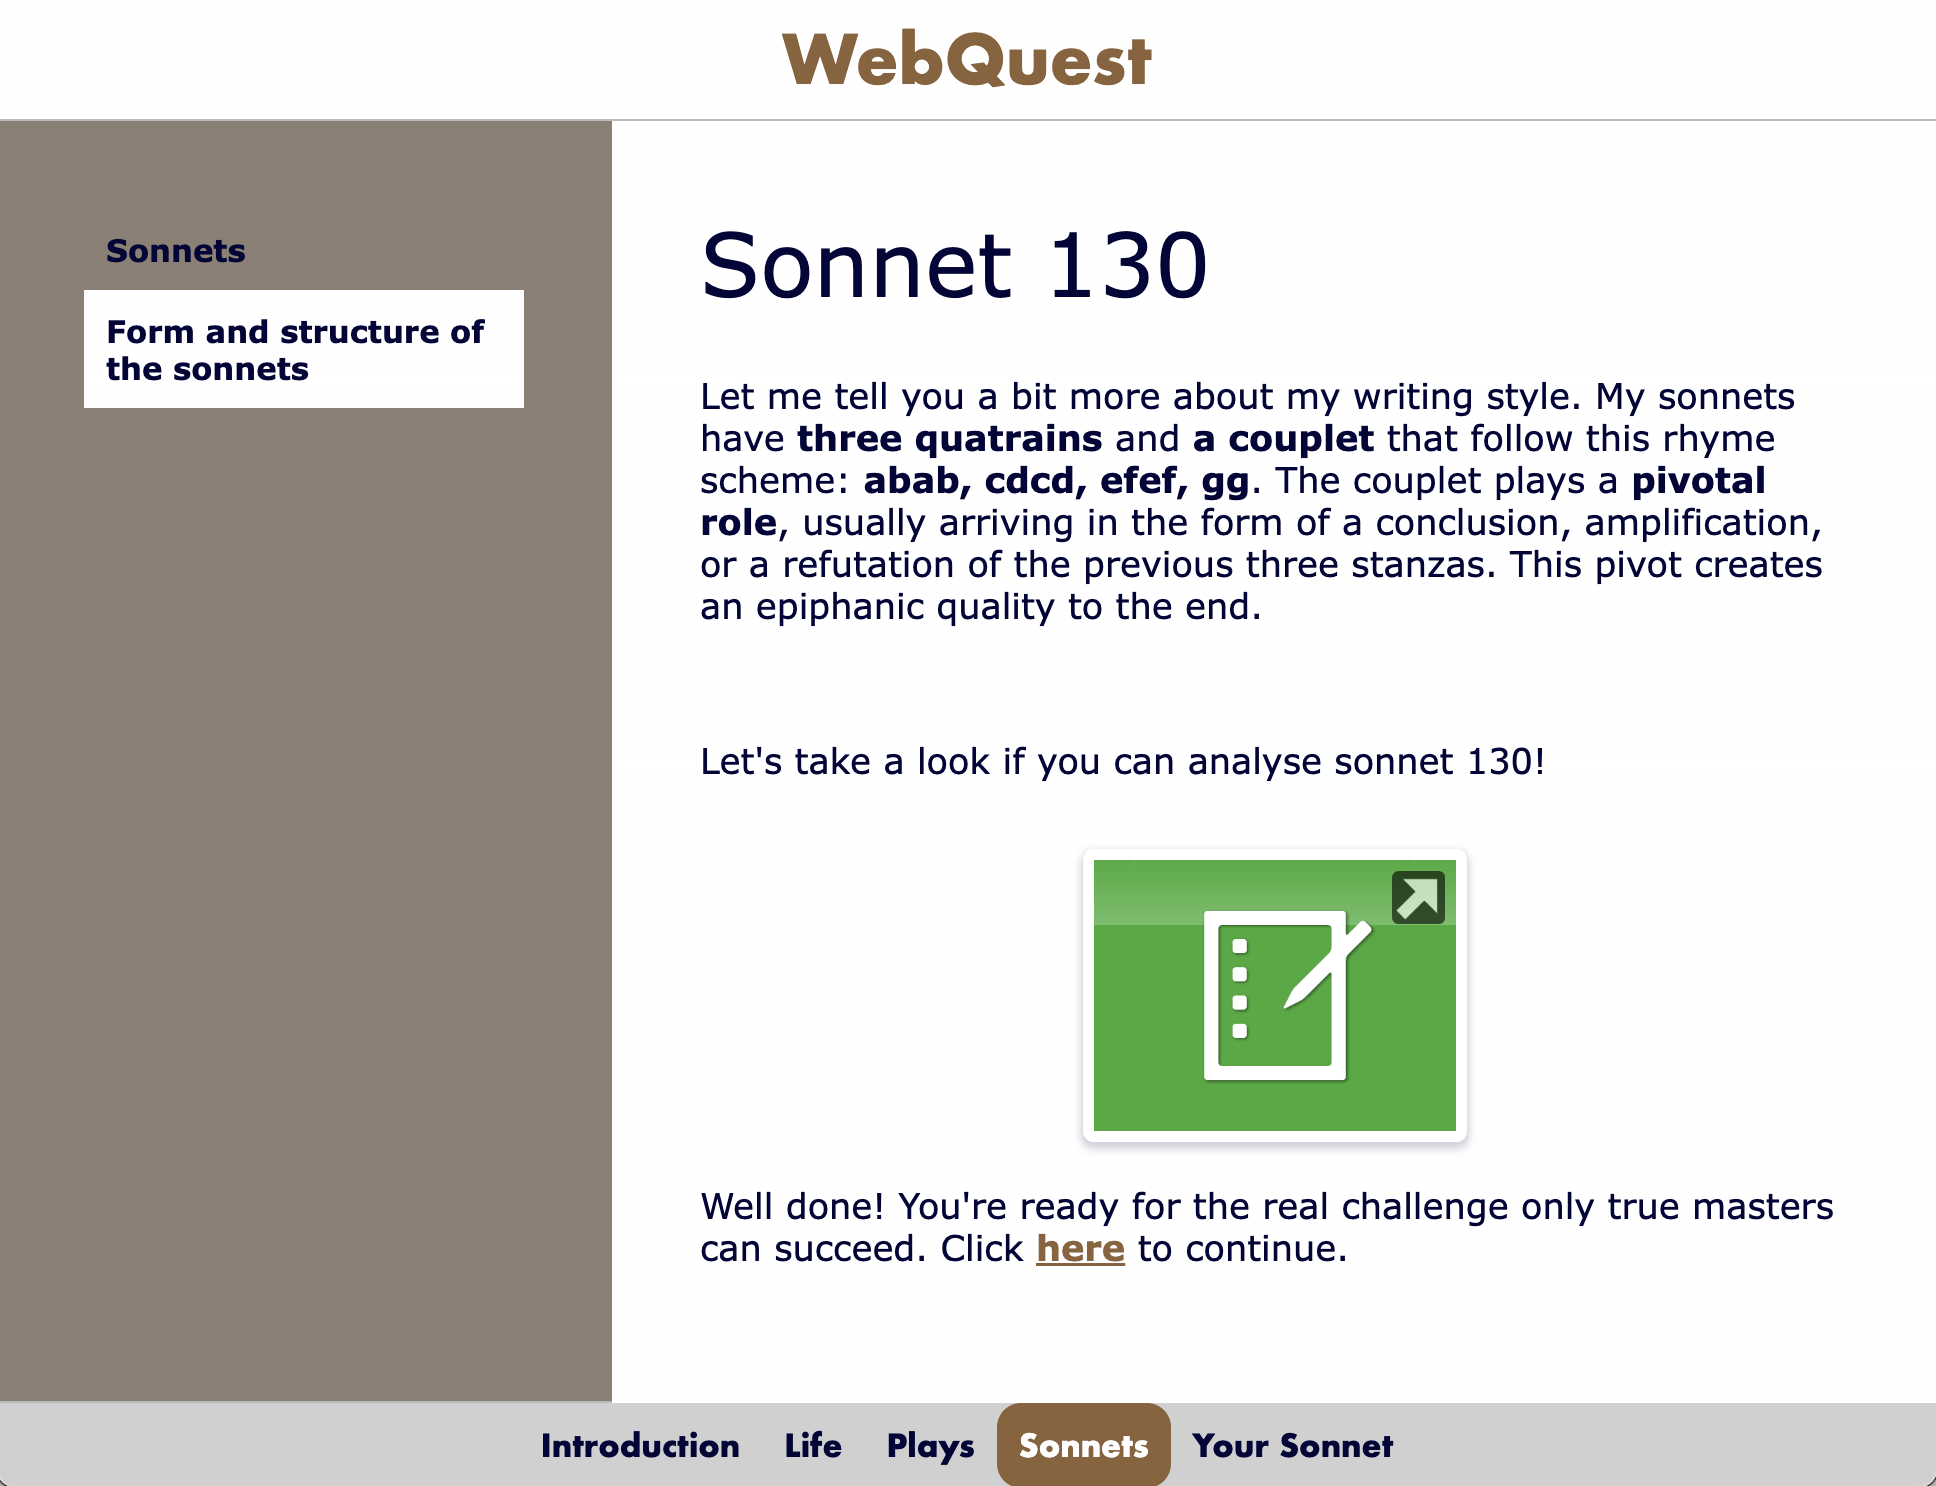 |
| Themed Digital Lessons | Create a fun lesson journey about a prominent theme for that time of the year. Example lesson about Cristmas from Charissa Jeurissen 👉 | 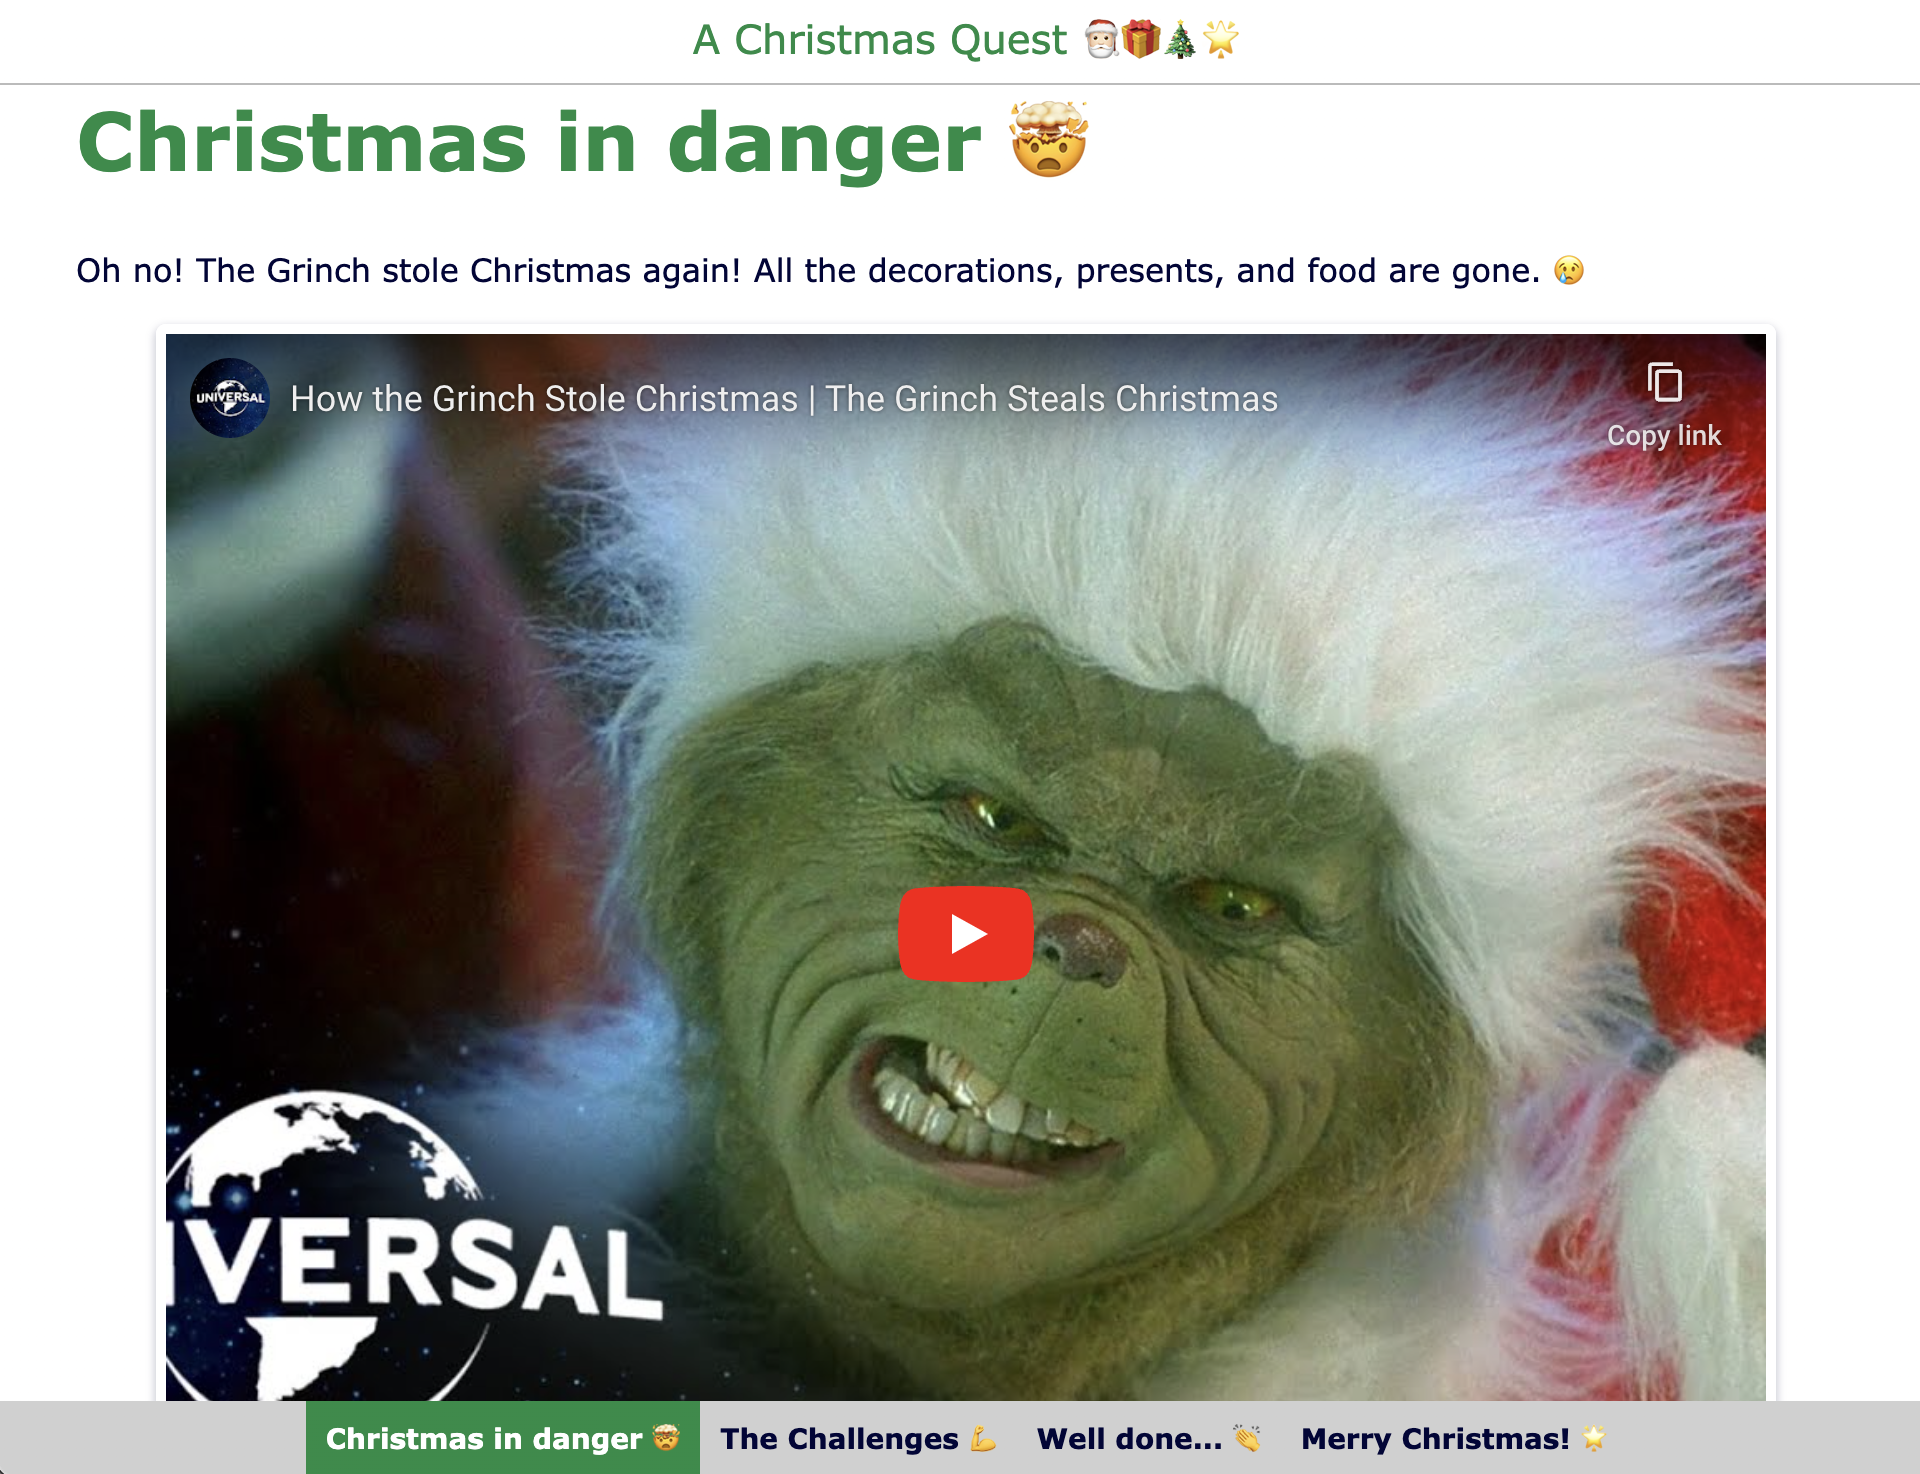 |
| Group Work WebQuest | Present real-world problems or challenges for students to solve in groups. Example lesson about our Solar system 👉 | 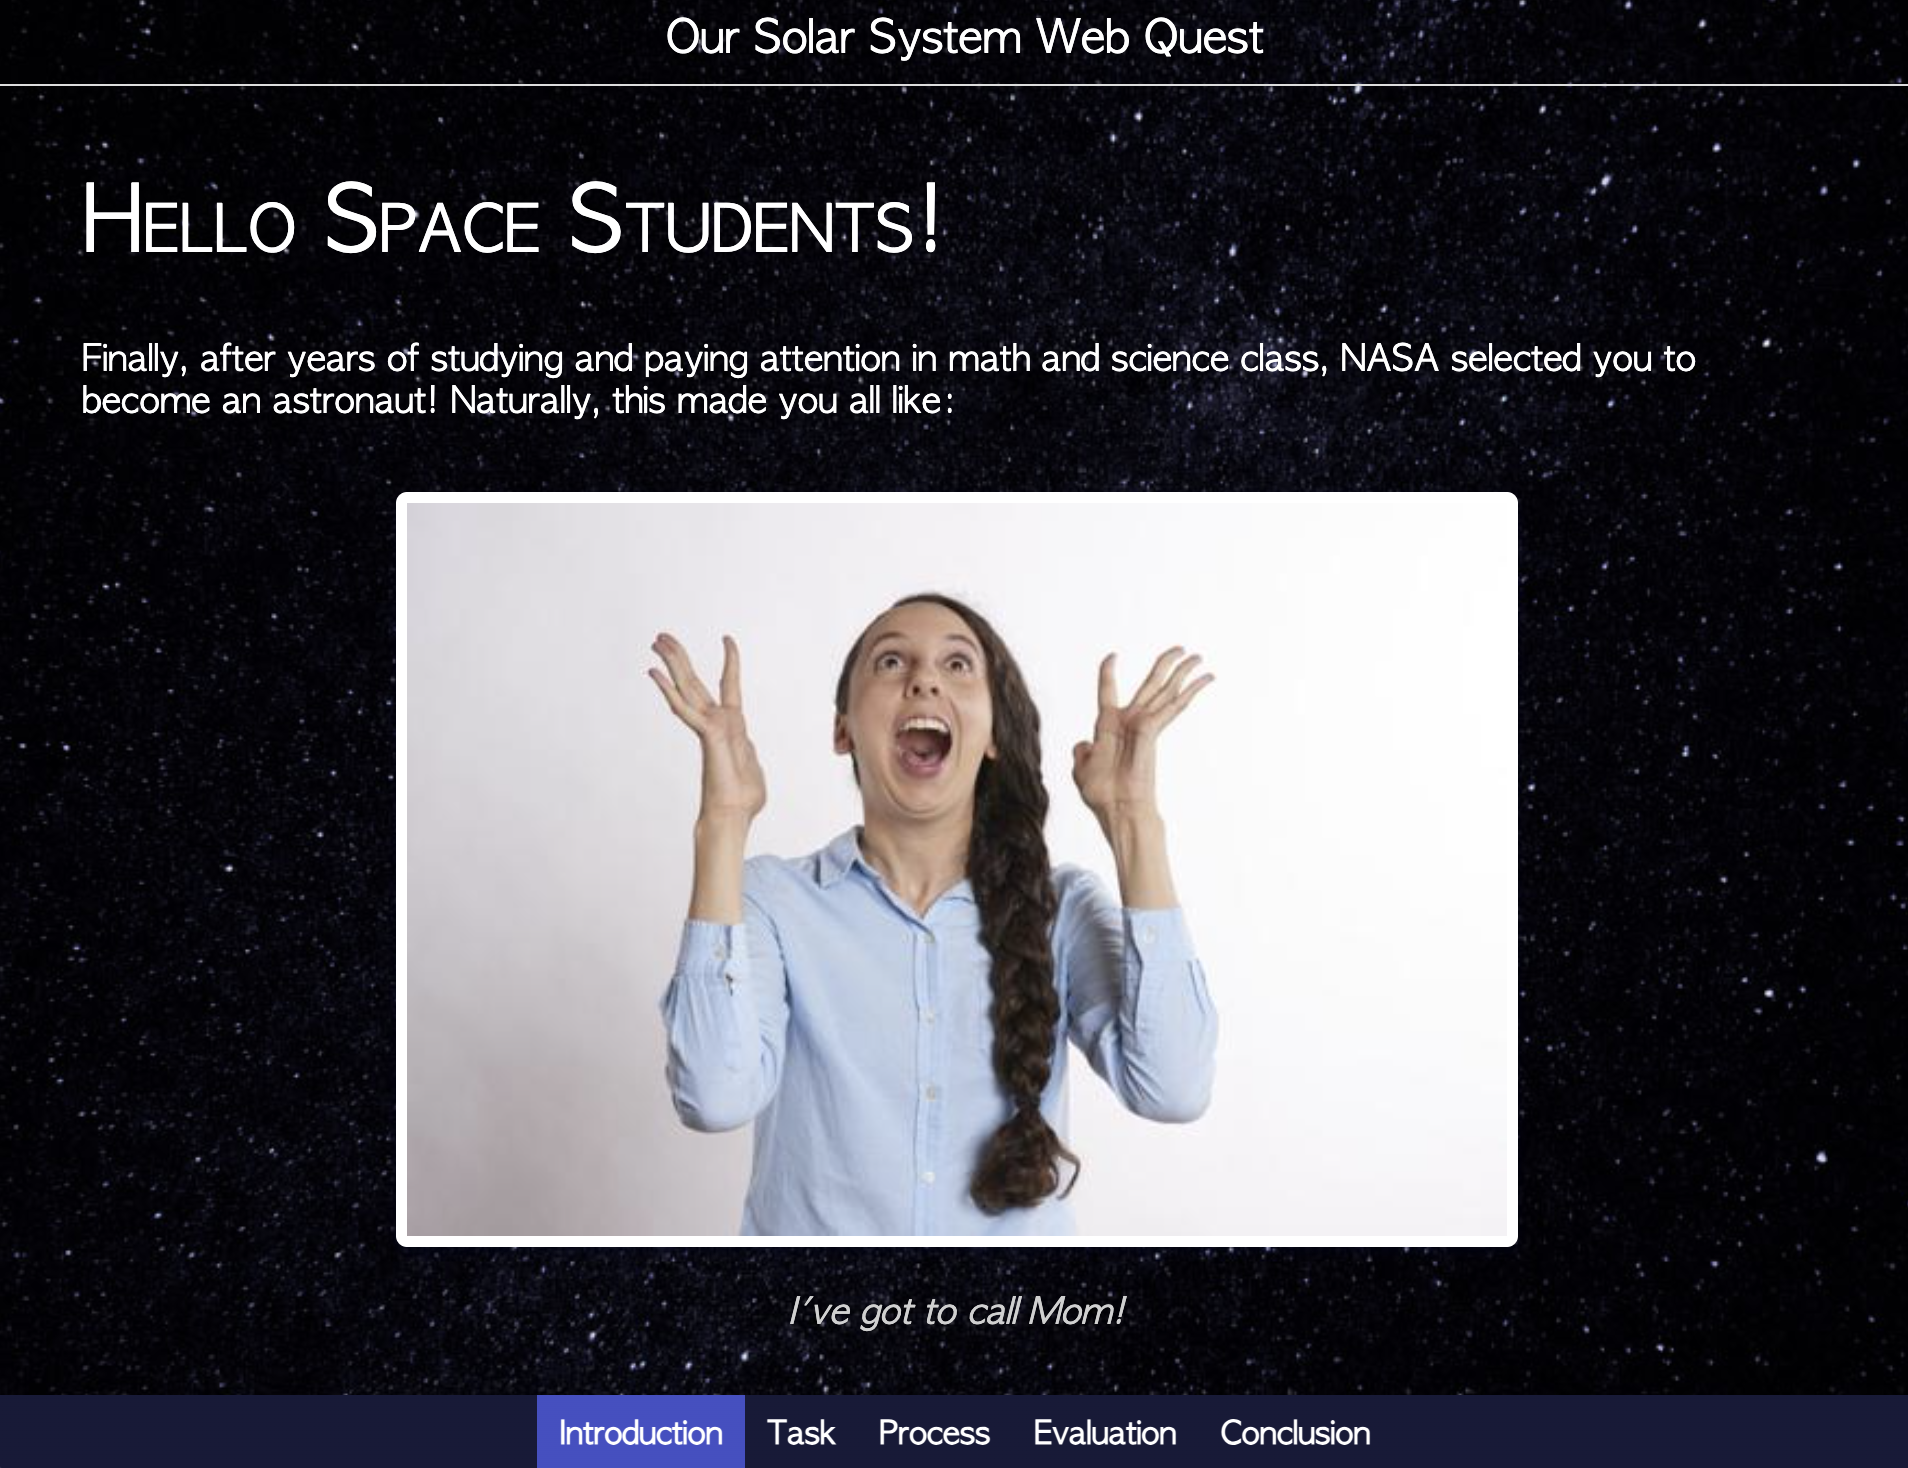 |
| Project-Based Learning | Develop a WebQuest that guides students through the steps of a hands-on project. Example lesson about Ecopoetry 👉 | 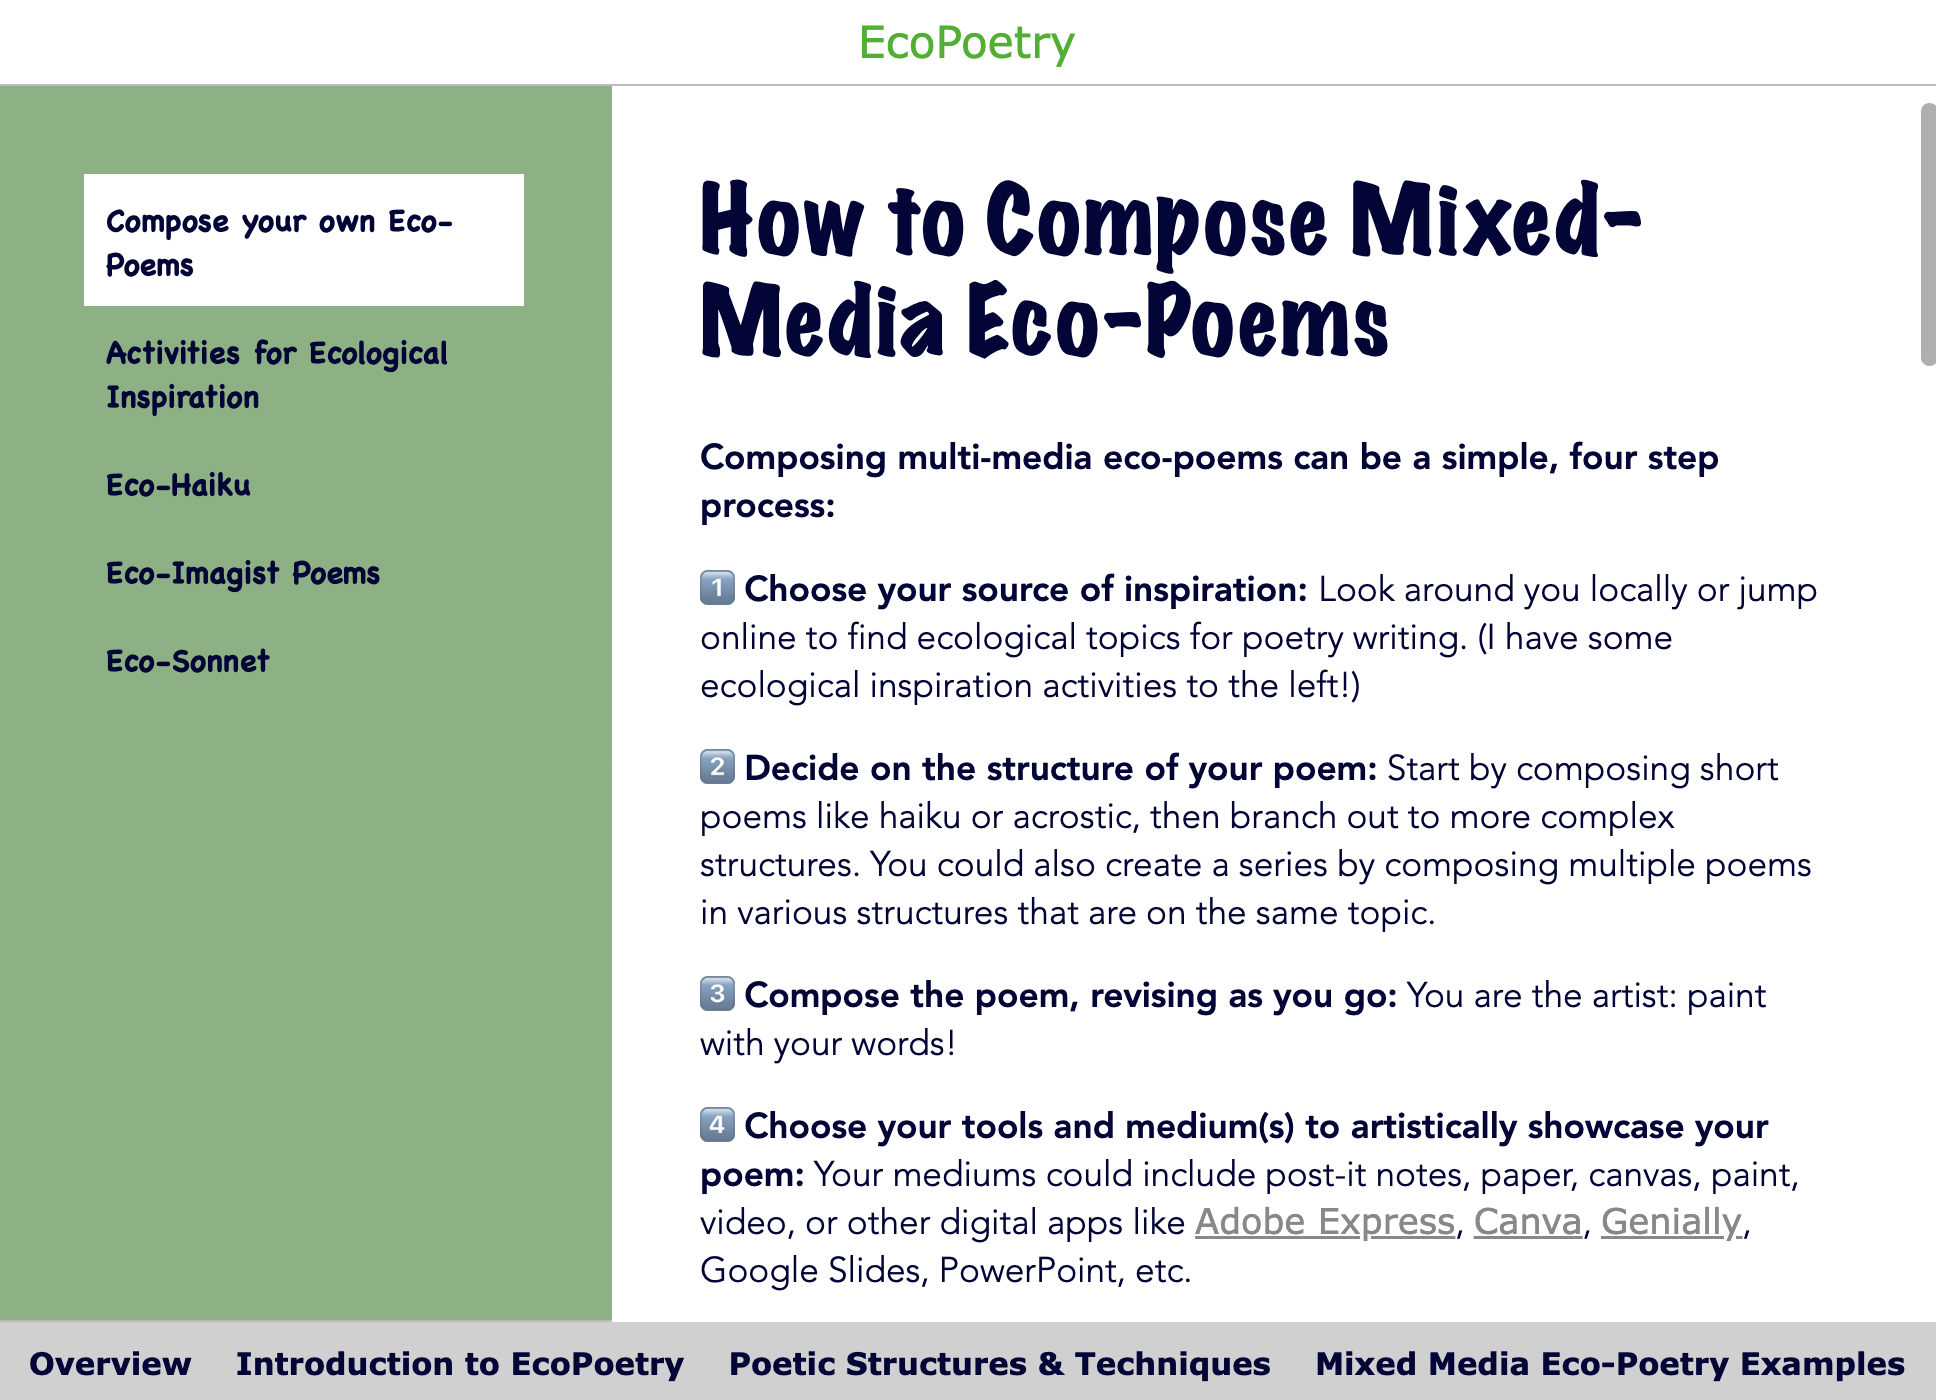 |
| Cultural Exploration | Introduce students to different cultures, languages, and traditions through curated online resources. Example lesson about Dia de los Muertos 👉 |  |
| Classroom Discussion Starter | Provide scenarios and resources to debate moral and ethical issues in class. Example lesson about Social Media 👉 | 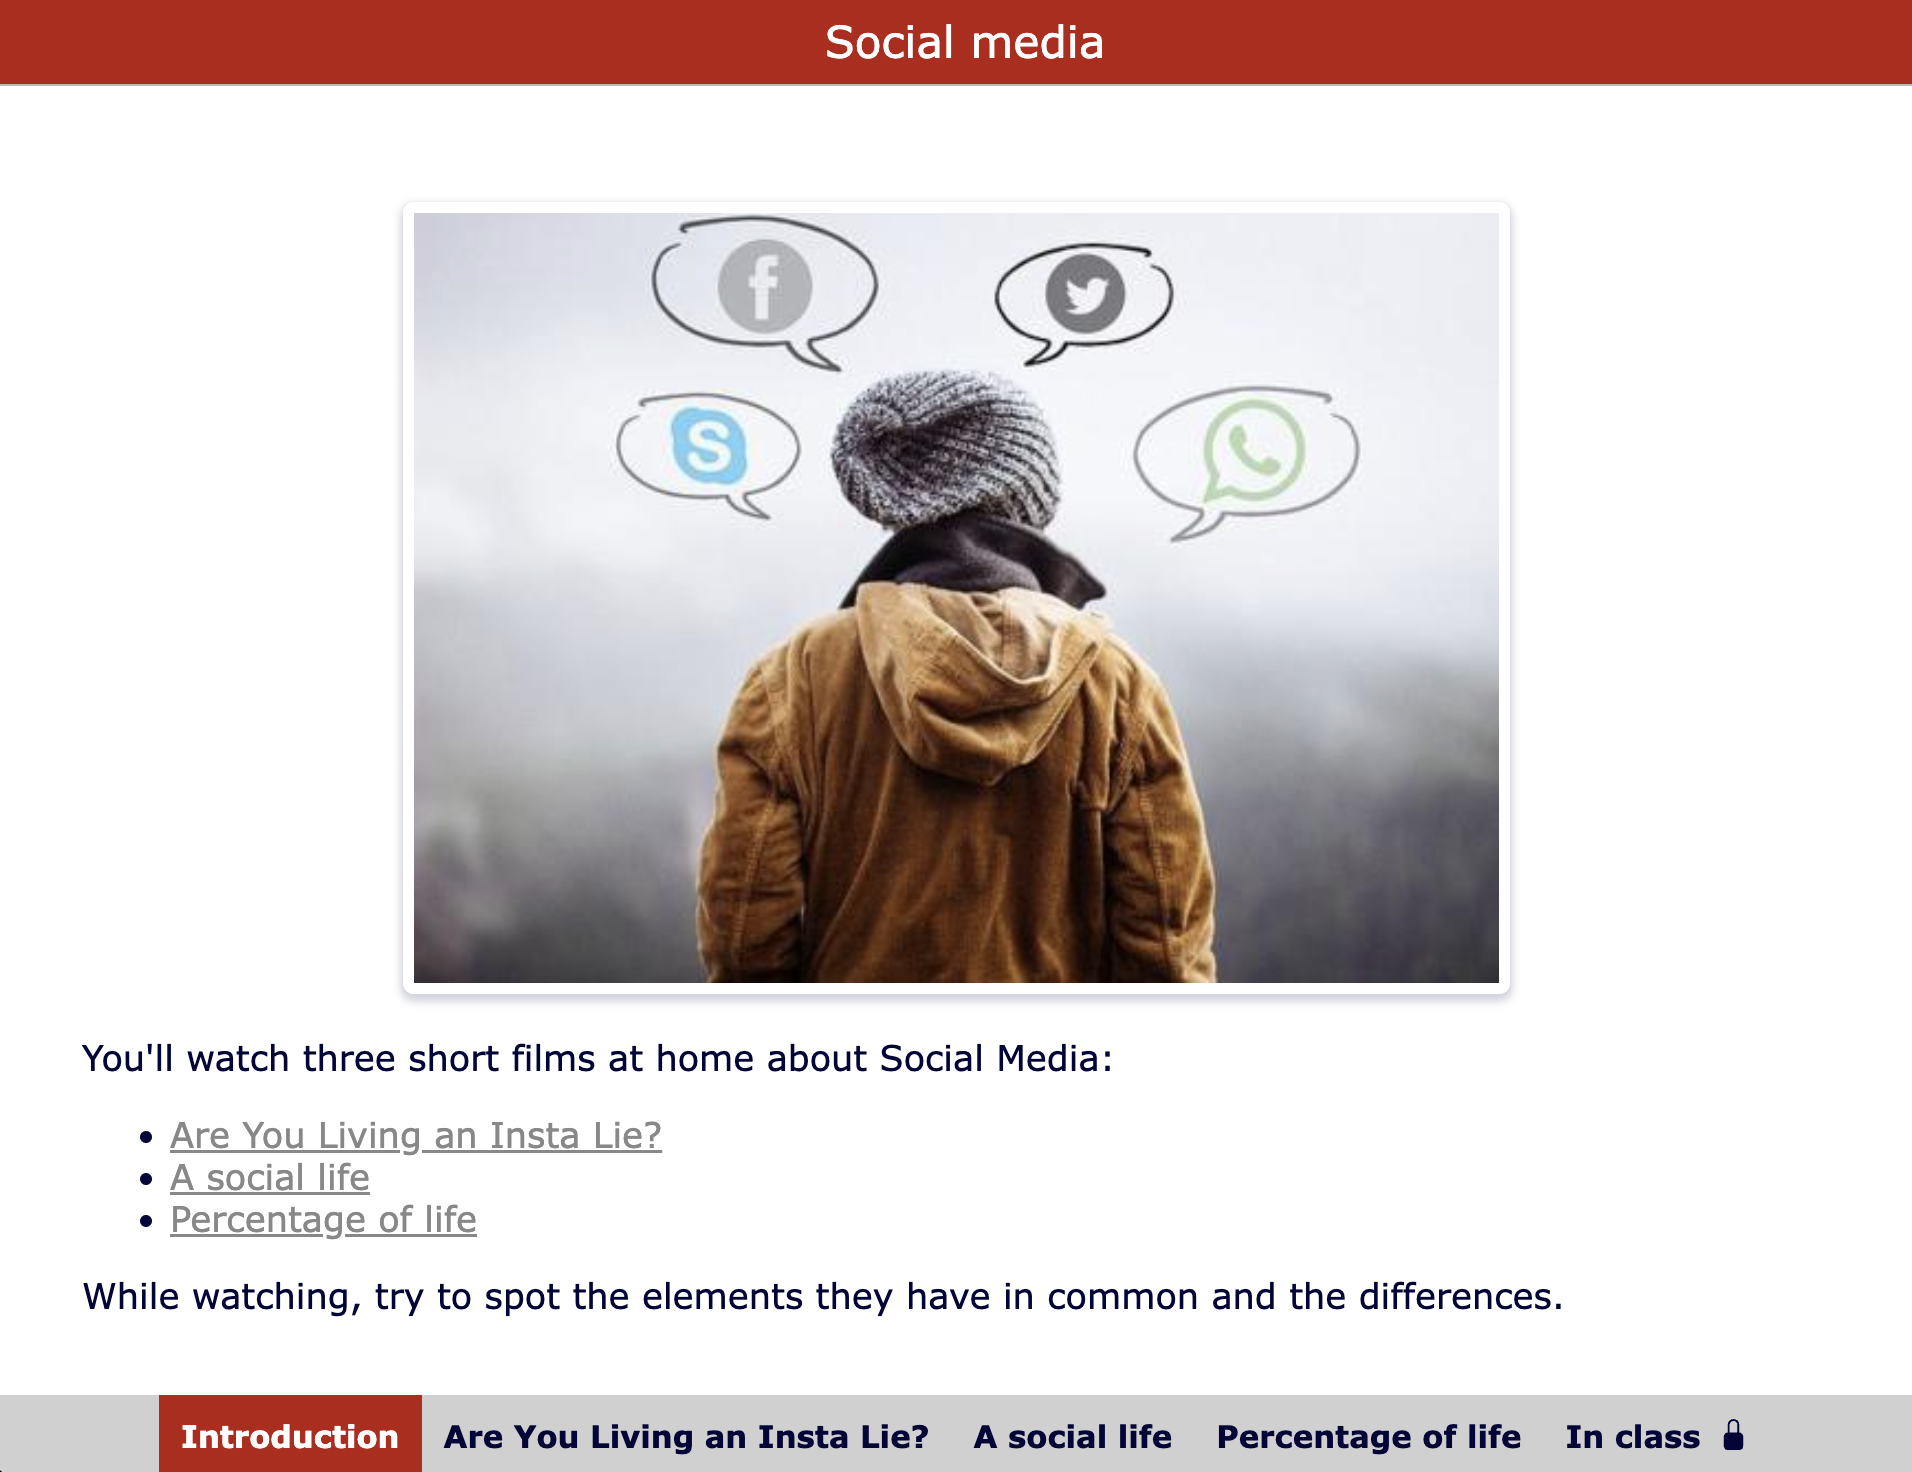 |
| Self-Regulated Learning | Let students self-regulate their learning by using this SRL WebQuest blueprint. Example lesson blueprint for SRL 👉 | 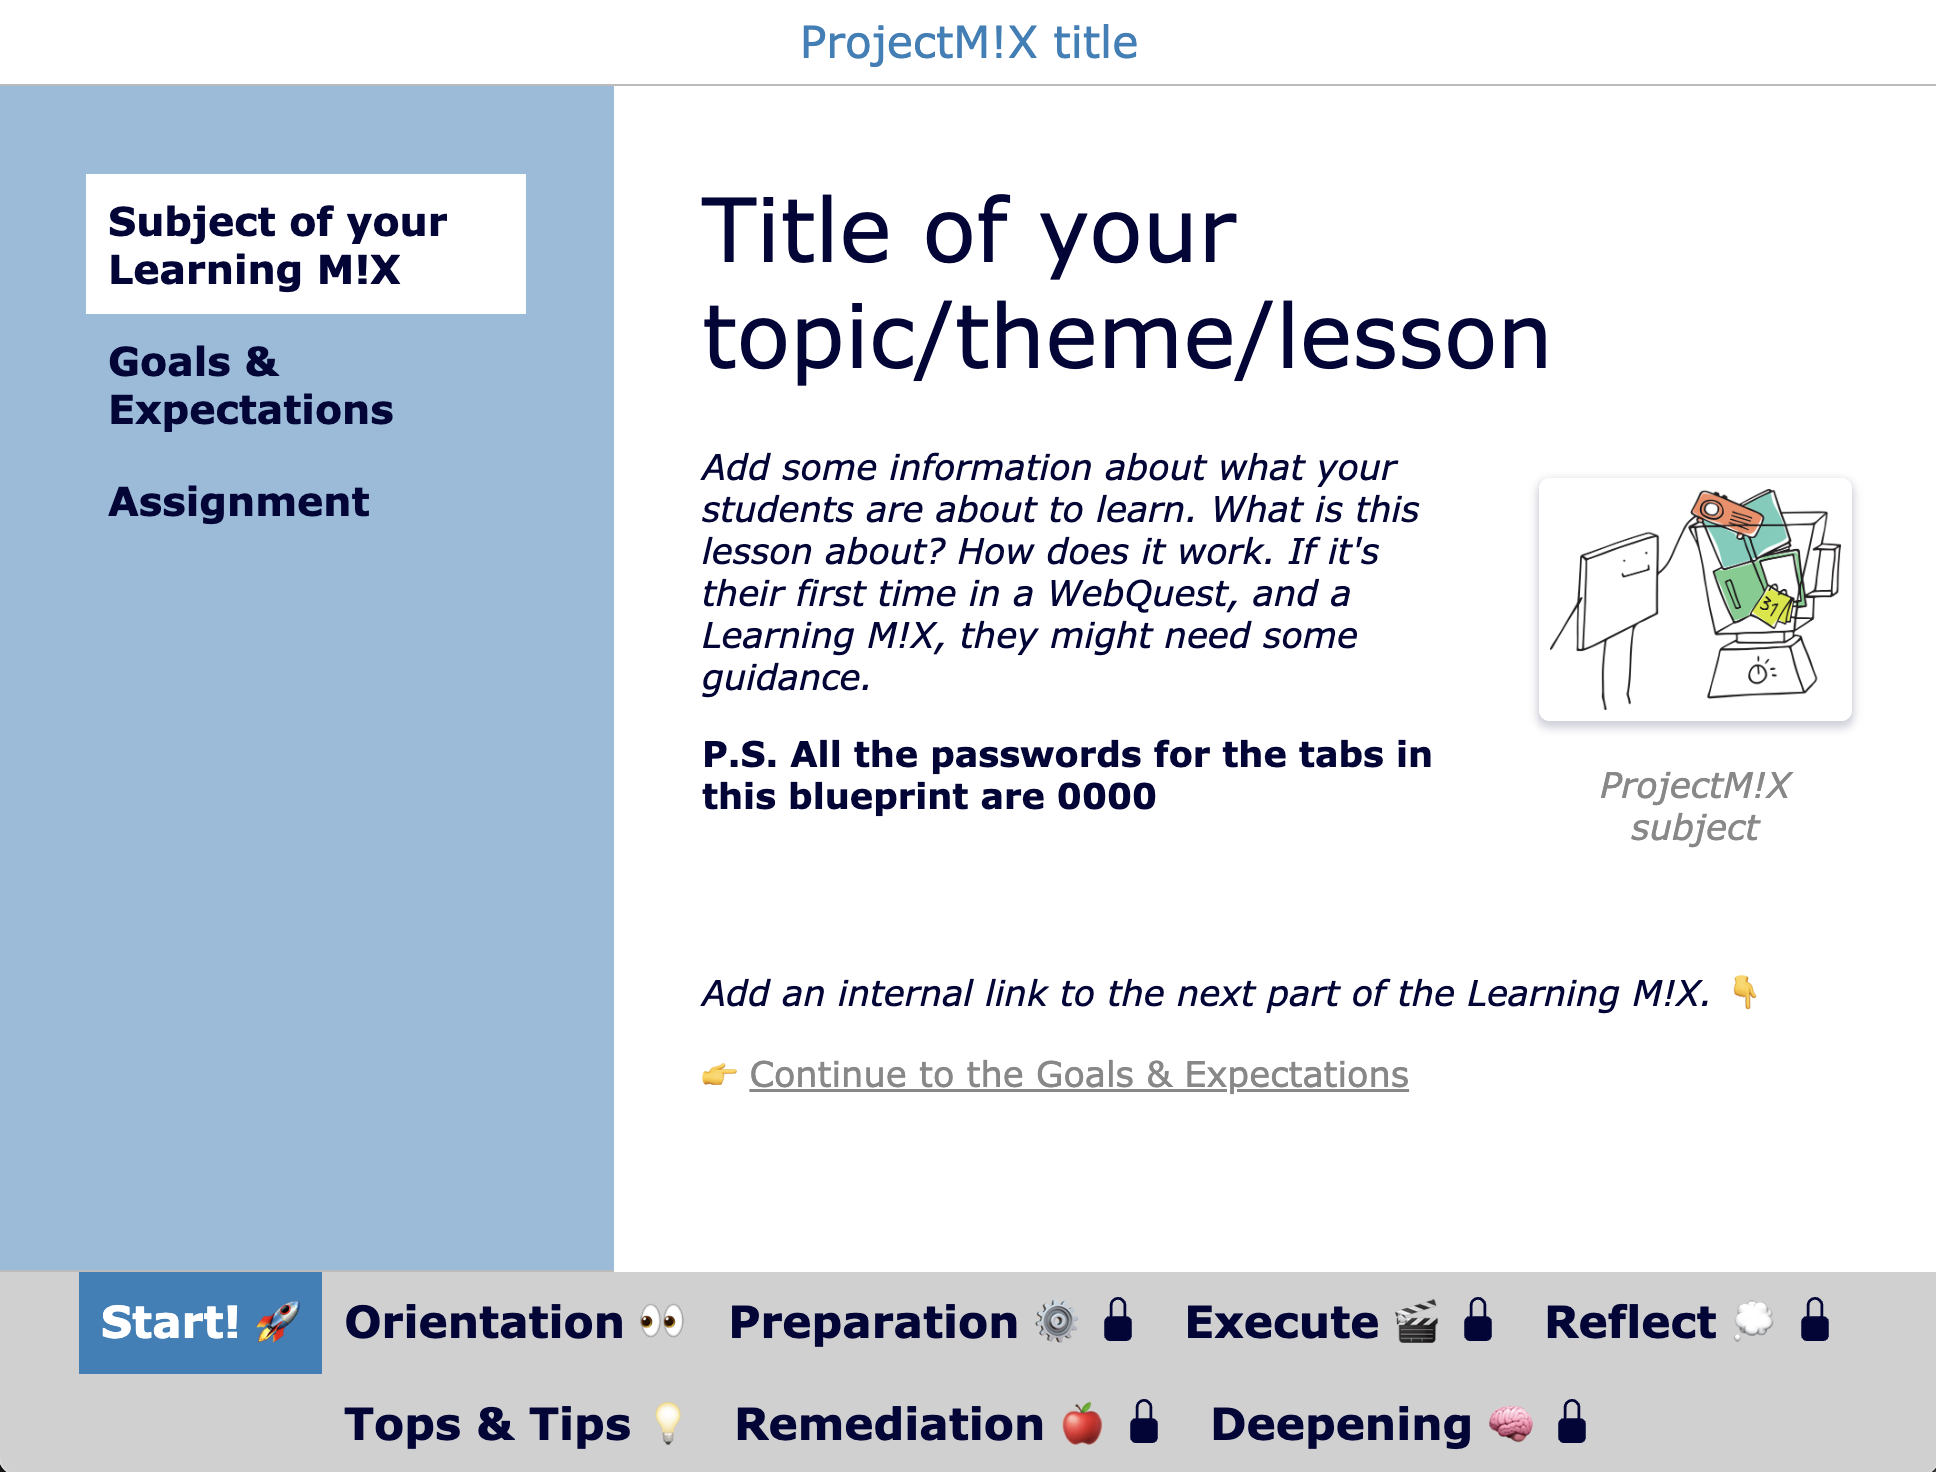 |
After looking at these examples, you must be wondering, “How can I create these interactive WebQuest-based lessons and share them with my students?” You’re in luck! I paved the road for you with this step-by-step WebQuest guide.
9 Steps to Create a Complete Digital Lesson Using the WebQuest Widget in BookWidgets
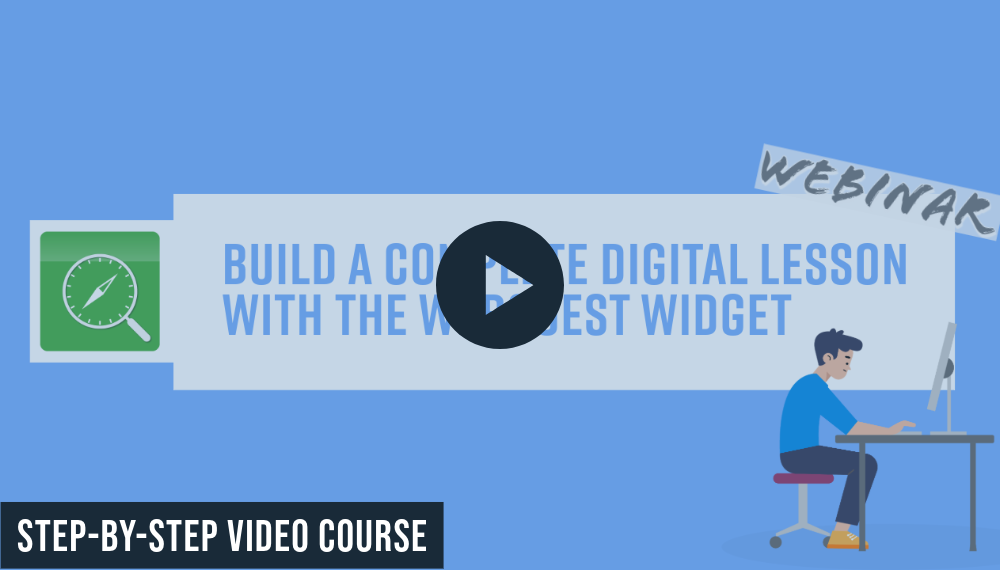
If you want to learn how to build a digital lesson with the WebQuest widget, you can follow these 9 easy steps below, or you can watch our free video course. We’ll demonstrate the examples above first, and show you how to create your digital lesson, step-by-step.
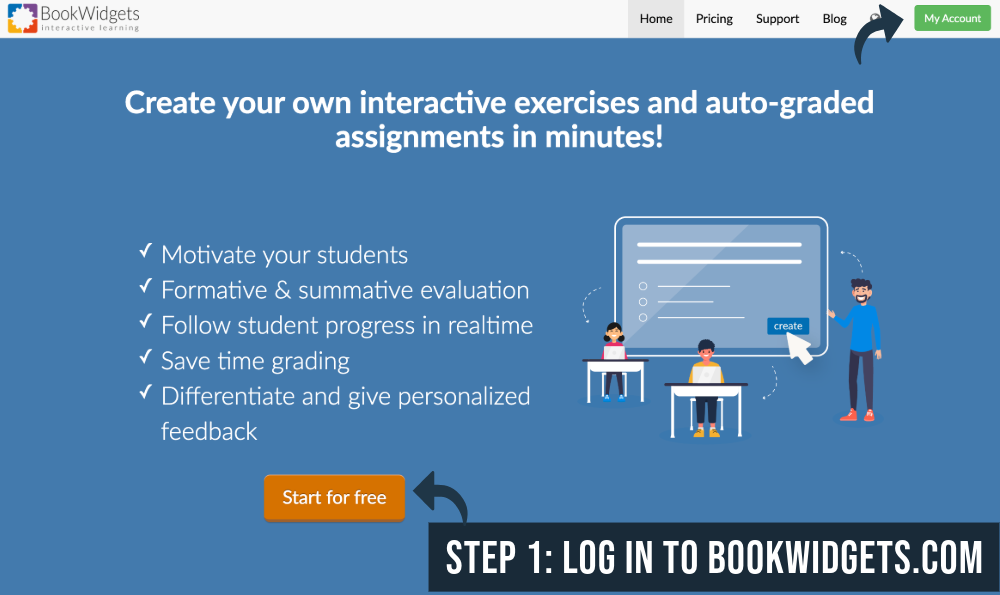
Step 1: Log in to BookWidgets
 Begin by logging in to your BookWidgets account. If you don’t have an account yet, sign up to get started. With BookWidgets, you can do so much more than just creating WebQuests! You’re in for a treat.
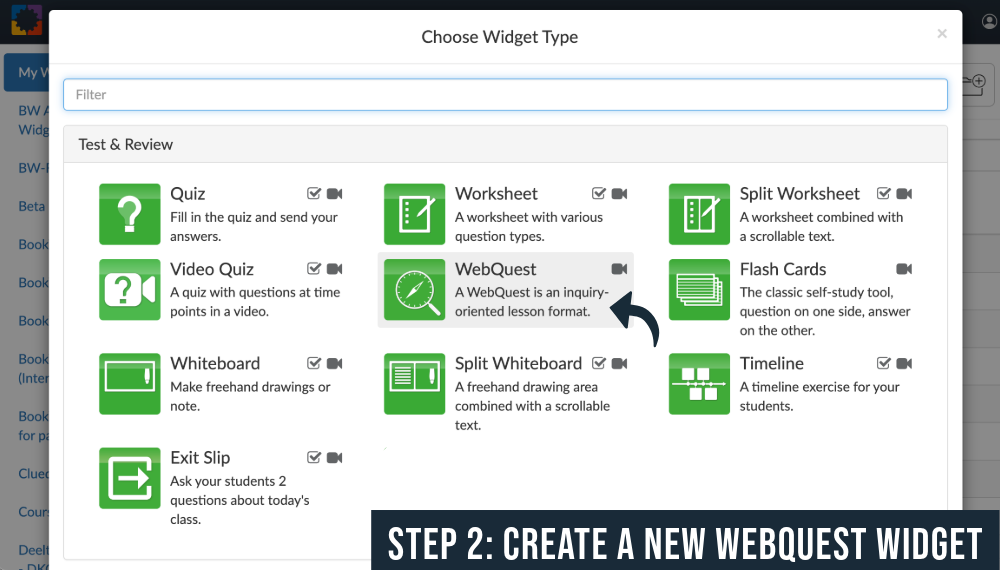
Step 2: Create a New WebQuest Widget
 Once logged in, click the “Create New Widget” button. Choose the “WebQuest” widget type from the list of available widgets. This will open a blank WebQuest template where you can begin building your lesson. Give your WebQuest a clear and concise name. This will be the title of your digital lesson, so make sure it reflects the subject or focus of the activity.
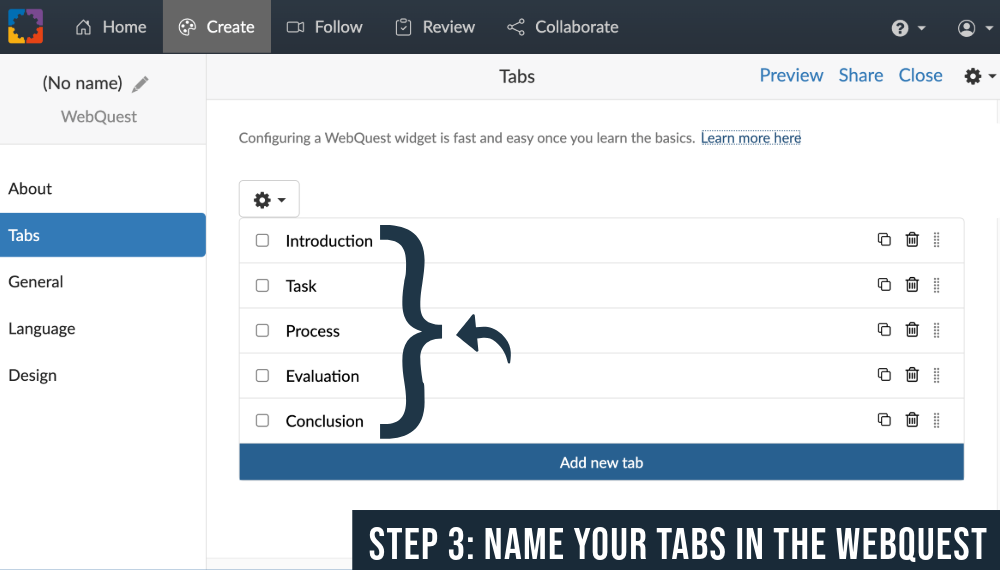
Step 3: Name your tabs in the WebQuest
 A blank WebQuest already has 5 (empty) tabs. They already have names, but you can change them to your course content and WebQuest concept. The names of the existing tabs refer to the WebQuest format, developed by Dr. Bernie Dodge at San Diego State University in 1995. A WebQuest typically has six common stages:
- Introduction: Start with background information about your lesson. This will guide students to the beginning of the inquiry process. A short story usually works best here.
- Task: In this section, you’ll give students a mission related to your story. It’s the goal of your quest. In most cases, it’s a single question that requires students to analyze information.
- Process: Clearly describe the steps students should follow to accomplish the task. For every step, you can provide web links; adding more interactive widgets is even better, resulting in a much richer and more modern learning experience.
- Evaluation: In many cases, you’ll want to evaluate and grade your student’s work, so this section should clearly outline the criteria. The standards should be fair, clear, consistent, and specific to the given tasks. It’s important to set clear goals, match assessments to specific tasks, and involve the learners in the evaluation process.
- Conclusion: Here, students can reflect on their work. “What have I learned? What went well? Where did I struggle?”
As you can see in the examples above, you don’t have to follow this WebQuest outline. Do what’s best for your lesson content. These tabs will be your guide to building your interactive lesson. And as every lesson has different stages, it won’t be hard to structure your tabs.
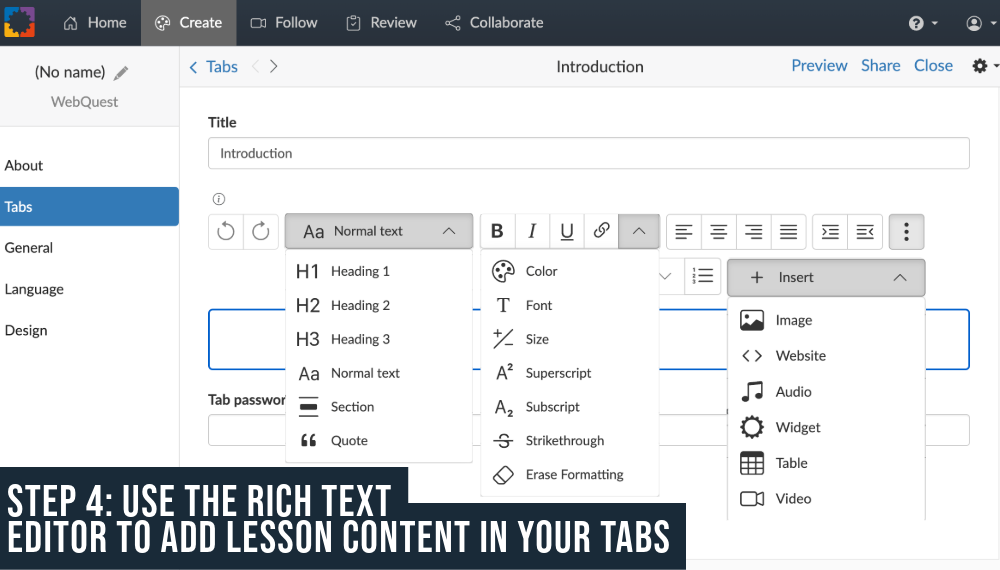
Step 4: Use the Rich Text Editor to Add Lesson Content in your Tabs
 With the rich text editor, you can create engaging and interactive content within each tab of your WebQuest. Start by adding formatted text to explain key concepts clearly. You can also embed images, videos, audio, and links to external resources that complement the lesson. Use bullet points, headings, and numbered lists to organize information for better readability. The editor also allows you to integrate other widgets like quizzes, worksheets, and games directly into your WebQuest, ensuring a rich and immersive learning experience for your students.
There are a few more important things you can add to a tab in a WebQuest using the rich text editor:
- Divide tabs into sections: Sometimes, you need to break up your lesson into smaller parts so students can “digest” the content more easily. Creating sections within one tab is a great way to do this.
- Build internal links: This will guide your students from one tab to the other, ensuring they follow the right lesson path you’ve intended. When your students click an internal link, indicate where they should go next. Which tab? Which section within a tab?
- Lock tabs with passwords: You can lock certain tabs for students so they can only move on when you think they are ready. You can provide these passwords automatically when they pass a BookWidgets quiz or worksheet (every student can work at their own pace), or you can hand out the passwords in the classroom by writing them on the blackboard.
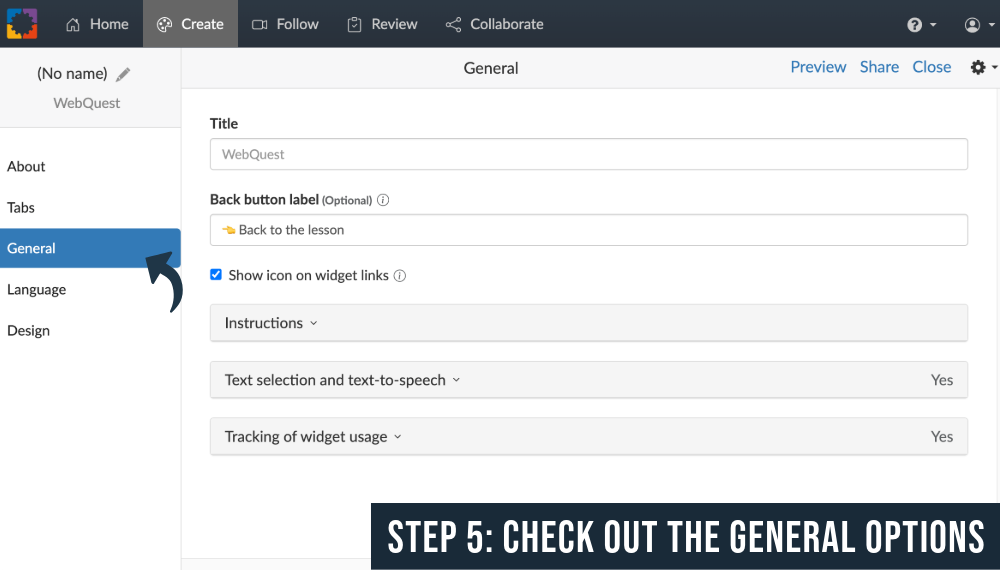
Step 5: Check the General Options
 The General Options tab within the WebQuest editor allows you to fine-tune the settings for your WebQuest. Here, you can control navigation options. Add text to the “Back button label” that will appear in the back button of embedded widgets so your students know the way back to your digital lesson.
You can also add rich text instructions that will appear to students when they first open the WebQuest activity. Students can hide the instructions and bring them back when needed. This gives you many ways to use instructions in a WebQuest:
The General Options tab within the WebQuest editor allows you to fine-tune the settings for your WebQuest. Here, you can control navigation options. Add text to the “Back button label” that will appear in the back button of embedded widgets so your students know the way back to your digital lesson.
You can also add rich text instructions that will appear to students when they first open the WebQuest activity. Students can hide the instructions and bring them back when needed. This gives you many ways to use instructions in a WebQuest:
- Clarification of Key Concepts: Provide in-depth explanations or clarifications of key concepts that students can refer back to when needed.
- Scaffolding: Offer step-by-step guidance that supports students in completing tasks progressively, which they can hide once they feel confident.
- Study Tips: Include tips for effective studying, research strategies, or note-taking techniques to help students manage their work.
- Alternative Approaches: Present different ways to approach the task, giving students options based on their learning style.
- Troubleshooting Guide: Offer solutions to common problems or challenges students might encounter during the WebQuest as a handy resource.
- Encouragement and Motivation: Add motivational messages or quotes to inspire students when they need a morale boost during the lesson.
- Additional Resources: Provide links to optional supplementary materials, such as further readings, videos, or websites, for students who want to explore the topic further.
- Differentiated Instructions: Provide varied levels of instruction for students of different abilities so they can choose the one that best suits their needs.
- Reminders and Deadlines: The tab reminds students of important deadlines, expectations, or checkpoints throughout the WebQuest.
- Reflection Prompts: Include reflective questions or prompts that encourage students to think critically about their progress and understanding of the lesson, which they can reference at various stages.
These hidden instructions are a flexible tool for enhancing student engagement and supporting personalized learning.
There are 2 more options you can enable within a WebQuest widget:
- Text selection and text-to-speech: Allow students to select text within your WebQuest. This will make it easier to copy and paste parts of the lesson into other websites when you want them to. It also clears the path to enabling text-to-speech within your digital WebQuest lesson. Choose 1 or 2 languages for the text-to-speech options. Students will be able to select the text and get an orange button to read it out loud.
- Tracking of widget usage: BookWidgets has a Live Widgets Dashboard, which allows teachers to monitor student progress live within the BookWidgets activities they are completing (through a learning management system). When you enable this option, you can see how far along your students are in your WebQuest and whether they are having trouble.
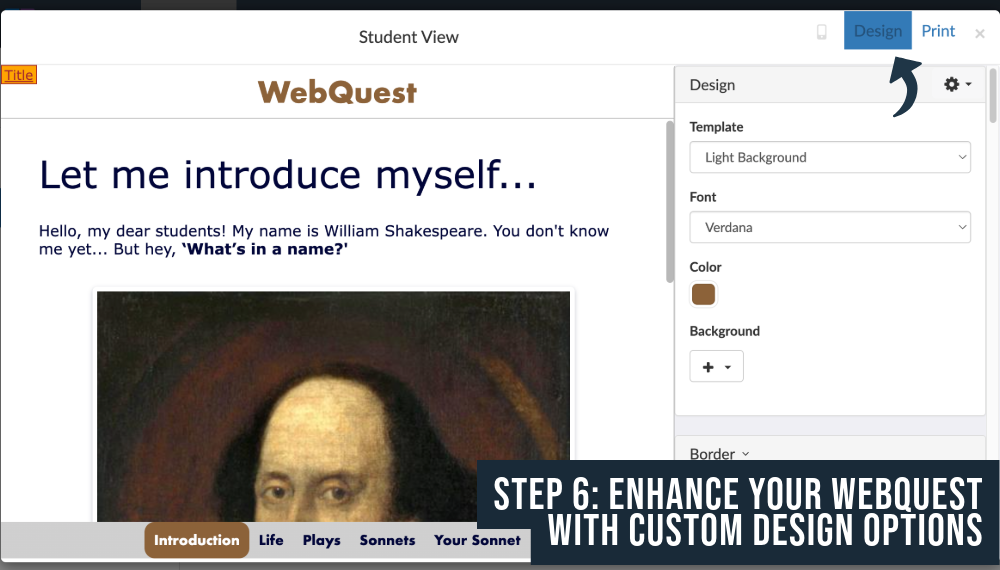
Step 6: Enhance Your WebQuest with Custom Design Options
 Give your WebQuest a polished and engaging look by exploring the design options. Through the preview button, you can see how your content will appear to students and make adjustments to the overall style. Experiment with different background images, colors, font styles, and layout settings to create a visually appealing and user-friendly interface. Adding custom images or themes can also make your WebQuest more inviting and immersive, helping to capture students’ attention and enhance their learning experience.
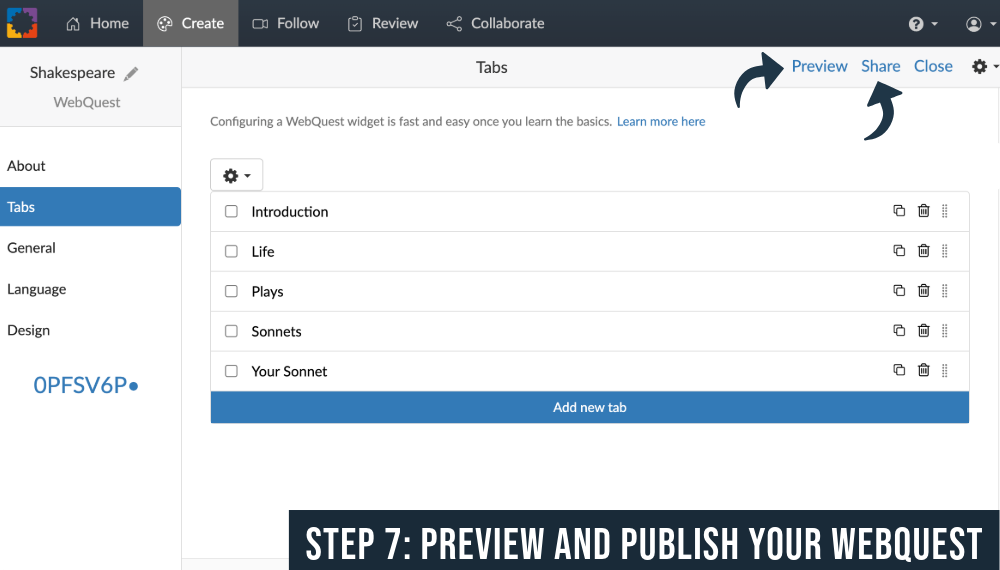
Step 7: Preview and Publish Your WebQuest
 Before assigning the WebQuest to your students, preview it. This allows you to experience the lesson as your students would and make any necessary adjustments. Once satisfied, publish the WebQuest and share it with your students via a link or your LMS (Learning Management System).
Step 8: Track Student Progress in Real-Time with “Live Widgets”
 With the “Live Widgets” feature, you can monitor your student’s progress in real-time as they work through WebQuest. This powerful tool lets you see which students are actively engaged, where they might be struggling, and how far along they are in the lesson. By monitoring their activity, you can offer timely support and feedback, address issues on the spot, and ensure that everyone stays on track. This live monitoring helps create a more responsive and interactive learning environment. Remember! “Live Widgets” only works when you share your WebQuest through a connected LMS (Google Classroom, Teams, Blackboard, Canvas, Moodle, …).
Check out the screenshot below and the explanation of the student data you can monitor live.
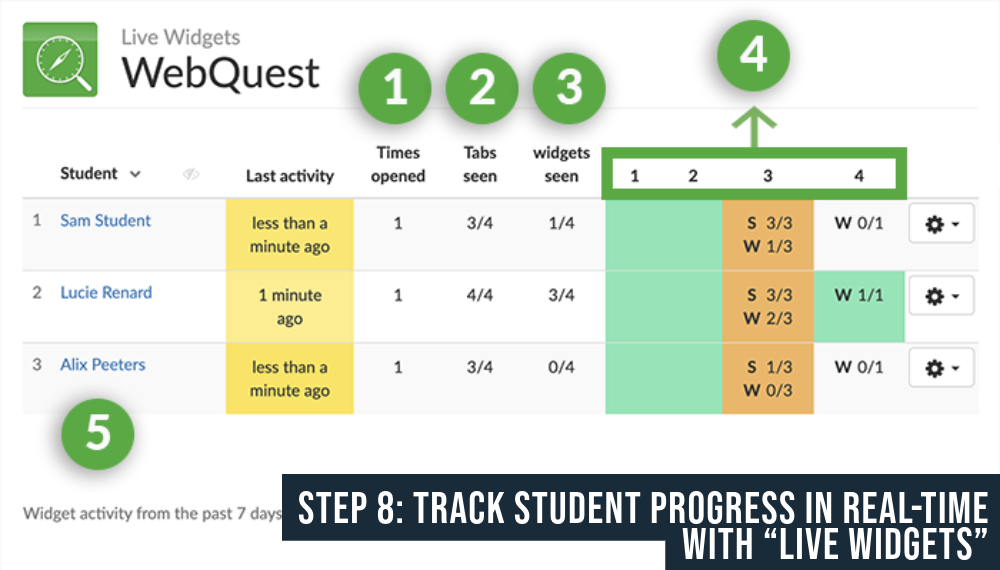
- Students and last activity: All students that opened your activity and a timestamp of when they were last active in your lesson.
- Times opened: For each student, you can see how many times they’ve opened your WebQuest. These are good statistics to have if you shared an additional practice bundle WebQuest students can use for more exercises.
- Tabs seen: As you can see in the example WebQuest, a WebQuest always has tabs at the bottom of the activity. This column shows you how many tabs your students have visited already.
- Widgets seen: Same thing goes for widgets. As a WebQuest is a “structure” widget with additional content, resources, and other widgets in it, you can see here how many widgets your students already opened. Keep an eye on your slow students, and make sure to challenge your pop-tarts.
- Tab numbers: Every tab has a number in the Live Monitoring Dashboard. When you hover over it with your mouse, you can see the title of that tab. When your students open that tab, it will color green. This way, you can keep track of your students’ progress throughout the entire WebQuest. Sometimes, a tab has some other statistics. You can find an “S”, which stands for “sections” (= when a tab is divided into different parts or sections). You’ll be able to see how many sections your students have gone through. You can also find a “W”, which stands for “widgets”. You’ll be able to see how many widgets your students have gone through for that particular tab.
- Student name: When you click on the name of a student, you get a bunch of new statistics. Go check out another screenshot below, and let’s the individual student insights!
 Let’s take a look!
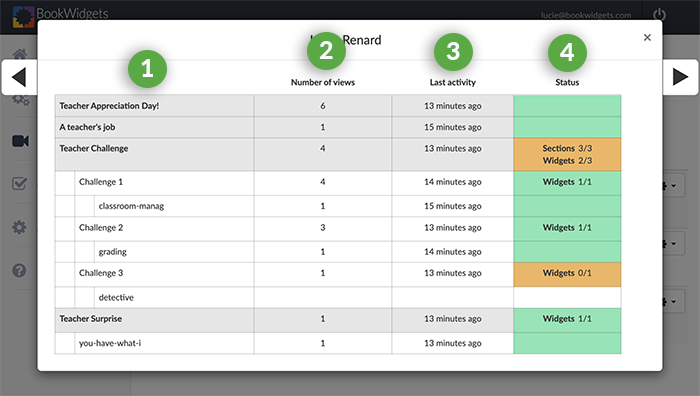
- Tabs: Here, you can find the title of all your tabs, the section titles (if you have any), and the widgets (W) in your tabs or sections (S).
- Number of views: You can see how often that student viewed a tab, section, or widget.
- Last activity: get some insights on the last time your student worked on your WebQuest or specific tasks in your WebQuest.
- Status: The status will turn green when they go through the tab, through all the sections, and through all the widgets in that tab. Orange, when they haven’t completed everything (didn’t open all the widgets or just went through the first section.) And white: your student hasn’t come to this tab or widget yet.
Step 9: Give Personalized Feedback on Student Responses
 Once students have completed your WebQuest, take the opportunity to provide personalized feedback on their answers. Although your students can’t really answer questions in the WebQuest itself, they can submit work to you within the embedded widgets. When you add separate widgets like quizzes, worksheets, and more and enable students to submit their answers, you can provide personalized feedback on those activities. When you return that feedback (within your students’ LMS), all the separate feedback on WebQuest activities will be listed together as they belong to your ultimate digital lesson.
Thoughtful and constructive feedback helps reinforce key concepts, clarify misunderstandings, and encourage further learning. You can address specific points in their responses, praise their effort, and offer suggestions for improvement. Timely and meaningful feedback not only helps students stay motivated but also deepens their understanding of the material, making your WebQuest an even more effective learning tool.
Check out this blog post or 1-hour free webinar to learn all about the BookWidgets reporting dashboard.


Wrap up
The WebQuest widget in BookWidgets, now enhanced with a rich text editor, is a powerful tool for creating interactive and engaging digital lessons. By following these 9 steps, you can craft a WebQuest that captivates your students and fosters critical thinking and inquiry-based learning. Dive in today and explore the endless possibilities!
By incorporating this guide into your teaching, you’ll be able to maximize the potential of BookWidgets and create digital lessons that genuinely engage and inspire your students. Remember, All the featured WebQuest lesson plans are free to use. You can duplicate the WebQuests from this group, adapt them, and share them with your students. Now you know how to design a digital lesson yourself, you can also create lessons on this topic or any other topic from scratch. Want to learn more about creating engaging lesson activities with BookWidgets?
✔️ Follow BookWidgets on X / Twitter, LinkedIn, Instagram, and join our teacher community on Facebook!
✔️ And, be sure to connect with me, Lucie, on LinkedIn! 👋

